A Painted-Floor-Inspired Coastal Cottage Kitchen Refresh
Today I am excited to finally reveal the blue and white checkerboard pattern I painted on my kitchen floor, as well as the mini refresh it inspired! Here are all the details and how to!
Our Pine Floors
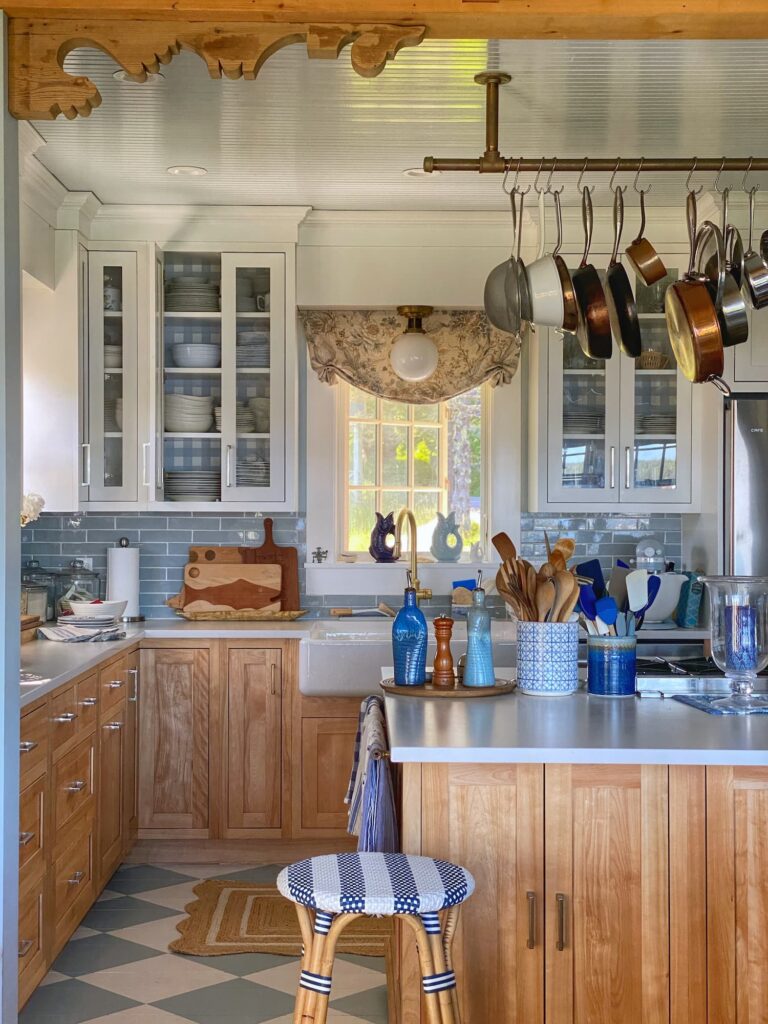
Our kitchen is just about 5 years old and I love it. With its two-tone cabinets, blue tile backsplash, big BlueStar range, and of course the water views, it is my happy place.
When we were having the house built, though, I had to make a lot of decisions. A LOT of decisions . Many of them based on budget.
You can read all about the story of our home build in my post Chasing a Dream: Our Coastal Maine House Story, Part 2.
Even though our house is brand new, I wanted it to have the feel of an old Maine coastal home passed down through the generations.
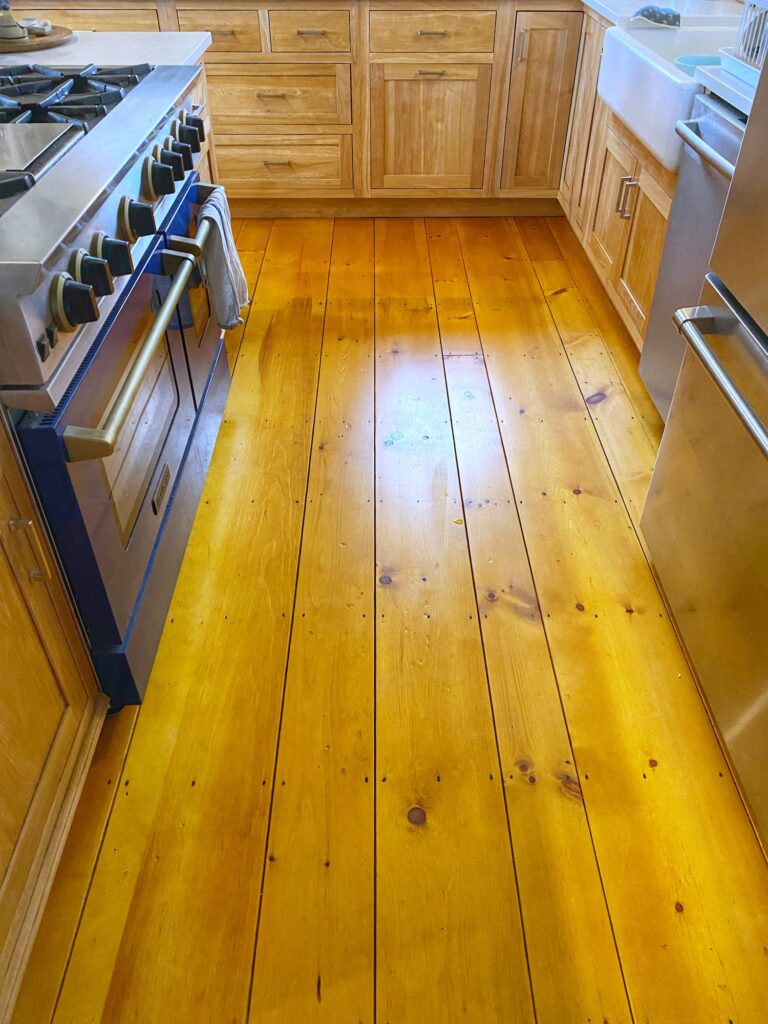
Random width pine boards, secured with old-fashioned cut steel nails, and sealed with a clear poly/oil finish was an economical way to get floors with that “old home” look.
The thing with new pine, though, is that, unlike the old heart pine floors I was inspired by, it is soft and damages easily. The dogs and life in general have already given them quite a beating. And while I generally love the look of pine as it ages, it can turn a little too orange.
I have a lot of natural wood furniture in the house, including natural red birch lower cabinets in the kitchen. Sometimes I felt the combination of wood floors and furniture felt too heavy. I wanted something a little lighter and brighter.
And of course, maybe a little color…
Painted Wood Floors

One classic element of coastal cottage style is painted wood floors.
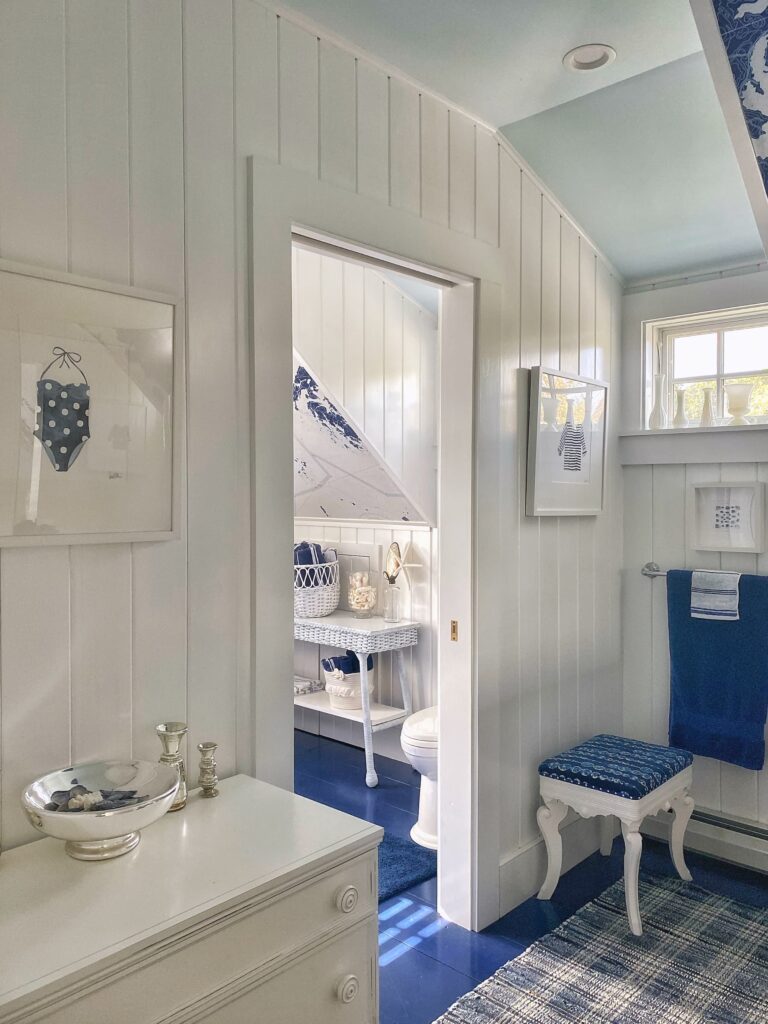
I chose blue painted wood floors for our upstairs hall bath and I absolutely love them!
Read all about this bathroom in my post Chart Your Way to a Classic Coastal Bathroom. It has a blue tile shower to match the painted floors and the absolute best custom Nautical Chart Wallpaper!
But back to the kitchen…
The design wheels started turning in my head as I admired painted floors on Instagram, in design books, and magazines. It seemed like the perfect cottage vibe for our home. And the kitchen was a great place to give it a try.
I just needed to work up my nerve to do it! Because once I started, there was no going back.
I bought the supplies and one day grabbed the primer and paint brush. I did hesitate slightly as I held my brush above the floor.
But ultimately I trusted my design instinct and the vision in my head.
And I am so glad I did — it transformed the space!
Read on for all the how-to details!
How To
Before I get to the how-to, I will say that painting a checkerboard pattern on your floors is not hard, but it is quite a lot of work and requires strict attention to detail (not always my strong suit….). It also took me quite a bit of time. The right tools definitely help. And I learned a few tricks which I will share with you.
Basically, though, if I can do it, you can too! Probably even better!
Let’s get to work!
Materials

These are the materials I used for this project:
- TSP cleaner
- Primer: I used INSL-X Stix Waterborne Bonding Primer.
- Two colors of paint: I used Benjamin Moore Floor and Patio Low Sheen in Chantilly Lace and Santorini Blue.
- Painters tape: I think Frogtape is the best.
- Medium sized angled paint brush
- Small foam brushes
- Paint roller with extendable/long handle
- Roller tray and liners
- Cardboard
- Packing tape
- Yardstick (preferably not wood): Mine is metal. You want a good smooth edge and accurate measurements
- Tape measure
- Lint roller (suggested if you have dogs)
- Pencil
- Work knee pads
- Mr. Clean Magic Eraser
Step by Step Process
This is how I painted my floor from planning to finish
1 — Wash the floor with TSP heavy duty cleaner to prepare the surface for painting.
2 — Use painters tape to protect any vertical surfaces which come in contact with the floor. (Baseboards, cabinet toe kick plate, etc…)
3 — Using a paint brush and roller, paint the entire floor with primer.
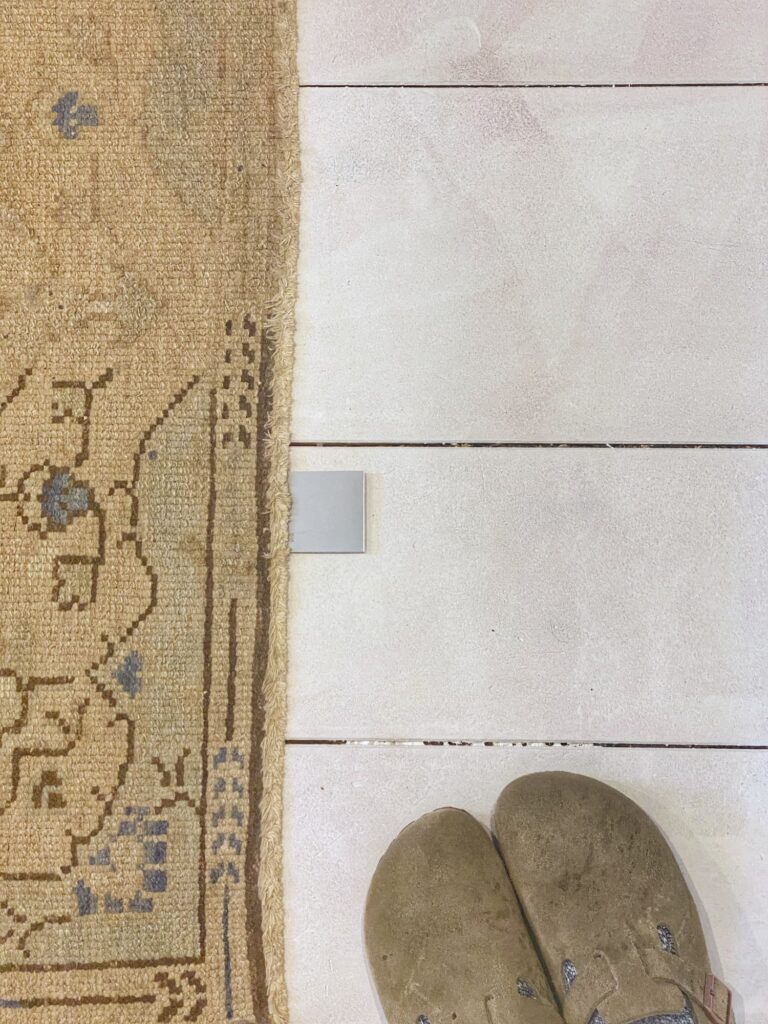
4 — Follow with the base color.

I was doing a blue and white pattern, so this was white for me. I needed three coats in addition to the primer.
5 — Measure your space and determine how large you want the squares to be and how you want them laid out.
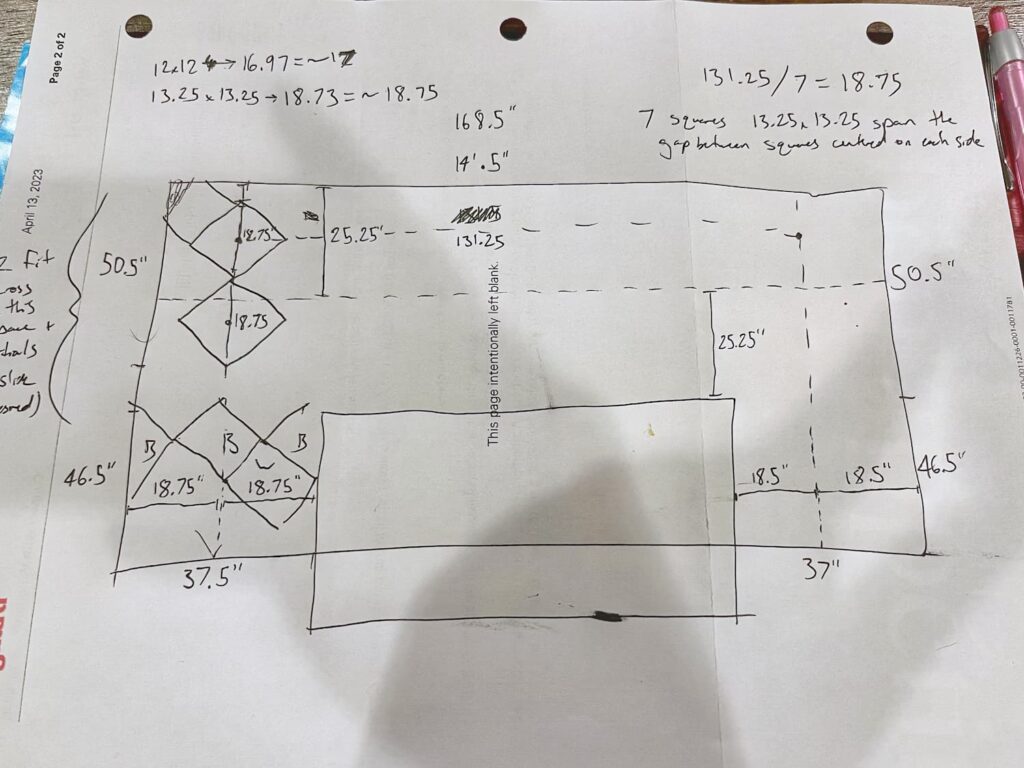
The overhang of the cabinets, island, and appliances and U shape of my space made measuring and layout a little tricky. I decided I wanted the design centered on all sides of the island. This is more my engineer son’s wheelhouse than mine, so I enlisted his help to determine how large the squares needed to be to achieve this configuration.
Keep in mind that if you are doing the checkerboard on the diagonal as I did, you need to use the diagonal measurement of the square. If you don’t have a son to do this for you, there are online charts and calculators!
In the end, the design did not end up being perfectly centered on all sides, but it is close enough!
Note: The calculations are much easier for a simple square or rectangular space!
6 – Create a template for the squares
I cut a template from a piece of cardboard and reinforced the sides with packing tape to create a smooth edge.
7 — Measure and draw any centering lines on the floor with a pencil
I drew lines down the center of all three sides of the island.
Note: My line was the “visual” center of each side, not including the part of the floor underneath the cabinet/island overhang.
8 — Using the template and a pencil, start to trace the pattern on the floor.
It was easy to center the diagonal squares on the lines just by lining them up corner to corner!
I used the template for all three of the centering lines.
9 — Using the yardstick, draw out the rest of the pattern.
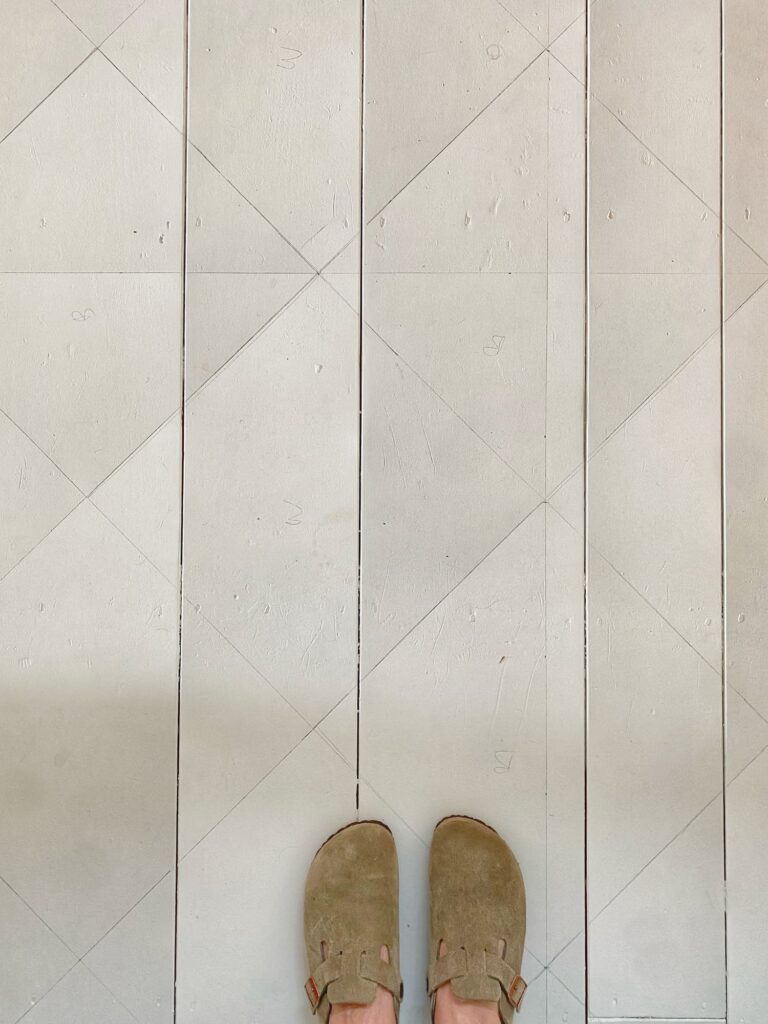
At this point you don’t need to measure each square. Just use the straight edge of the ruler to extend the edges of the squares you traced with the template, checking every few squares to make sure the size continues to be correct.
Keep in mind that if somehow the size of some squares ends up being a little off, it won’t be noticeable. Just make sure the lines are straight and you should be good!
10 — Tape the lines with painters tape
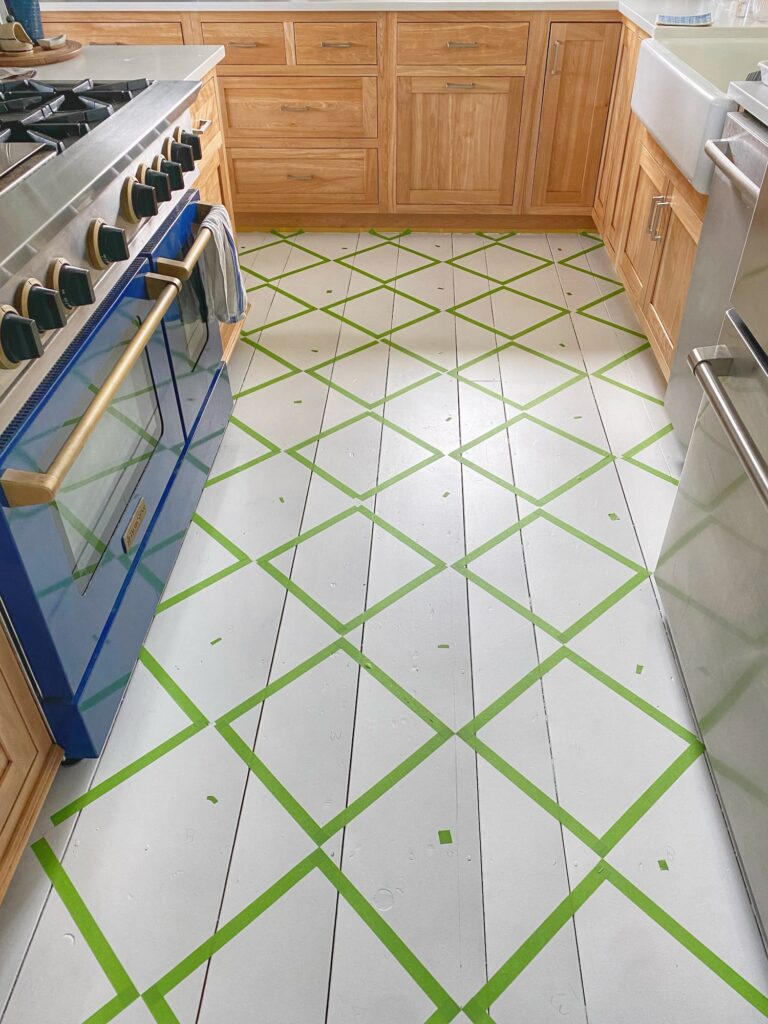
Before taping, it helped me to mark each square B for blue or W for white.
You only need to tape the squares that are not the base color. For me that was the blue squares.
Remember you are taping on the OUTSIDE of the lines.
It is easier to get sharp corners if you tape and paint in two phases, doing alternating squares in each phase.
I did it in in one phase. I just wanted to get all the taping out of the way at one time, so I had to be very careful taping the corners. You can get a more precise corner if you mark the corner on the tape with pencil and then use scissors to cut a straight line. Some corners I painted free hand. In retrospect, it might have been faster if I had used the two-phase method!
Note: Some people do not tape their pattern, but do it freehand. My hands are not that steady! Go for it if yours are, because taping is kind of a pain!
11 — Fill in the taped squares with your paint!

Again, this took me several coats
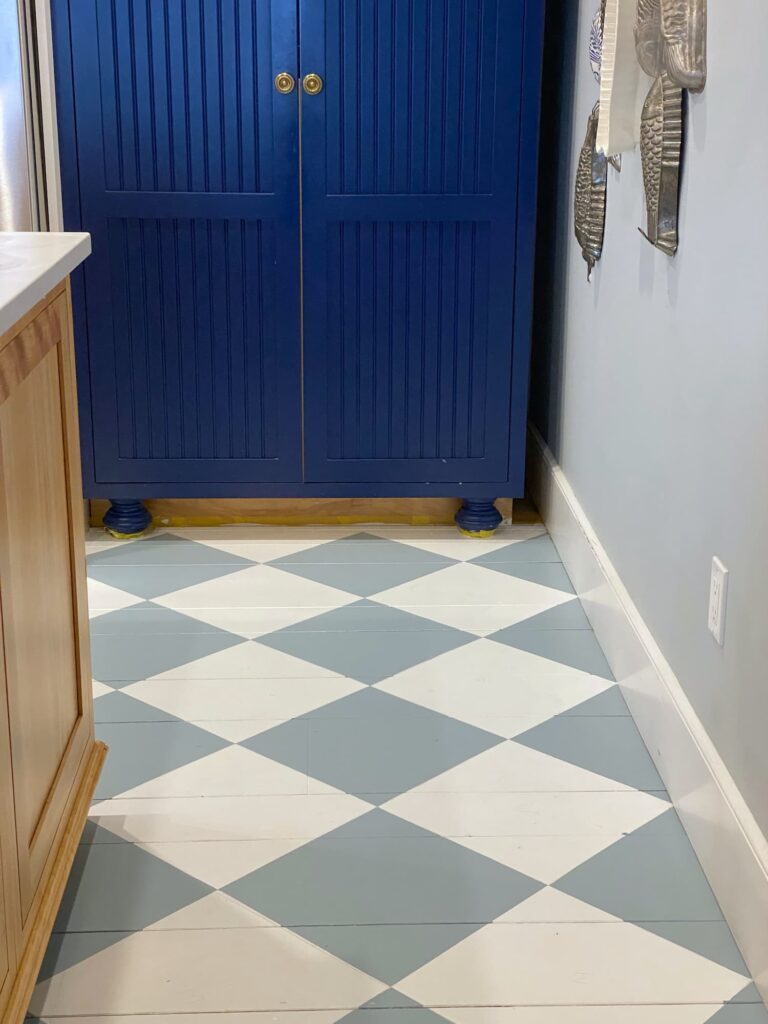
12 — The fun part! After the paint has dried, remove the tape and admire your checkerboard floor!
13 — But you aren’t quite done yet…
I am a perfectionist, so I went around with tape and a foam brush and touched up areas where the line wasn’t clean.
A small foam brush is best for painting a clean straight line without tape.
And while I got pretty picky with my lines, when you look at the floor as a whole, you don’t notice the small imperfections!
14 — I used a Mr. Clean Magic Eraser to get rid of any pencil marks that were showing.
15 — Enjoy your new floors!
Takeaways and Tips
- Wear a pair of work kneepads. You are spending a lot of time on your knees!
- I vacuumed and swept the floor each time before beginning work. With two dogs and two cats, though, we have a lot of pet hair in the house. I used one of those lint rollers with the sticky paper to clean each square before I began work on it. Still, there are some pet hairs painted into our floor….
- The white paint definitely shows the dirt more than my natural wood floor. It doesn’t actually get any dirtier, but I can see it more now. Maybe that is a good thing, though — it is encouraging me to clean my floor more often!
- Some people choose to finish the floor with a polyurethane topcoat. I opted not to. I know that our floor will get a lot of wear and tear, and I want to be able to easily touch up the paint when I need to. That said, I am not opposed to the paint taking on a “patina” over time. I will see how it goes. I am not ruling out putting some kind of finish on the floor in the future.
- Be patient and precise, but don’t worry about perfection! Your painted floor is hand-done and one-of-a-kind! No one will notice the small imperfections unless they get down on their hands and knees and inspect it closely. And you shouldn’t care about what those kinds of people think anyway!
- If you want a floor that will remain pristine, this is not for you! I want our place to have the feel of any old family home, so this kind of floor is exactly the vibe I am going for!
Wallpaper in the Cabinets

As often happens, once you make one change, you end up making others!
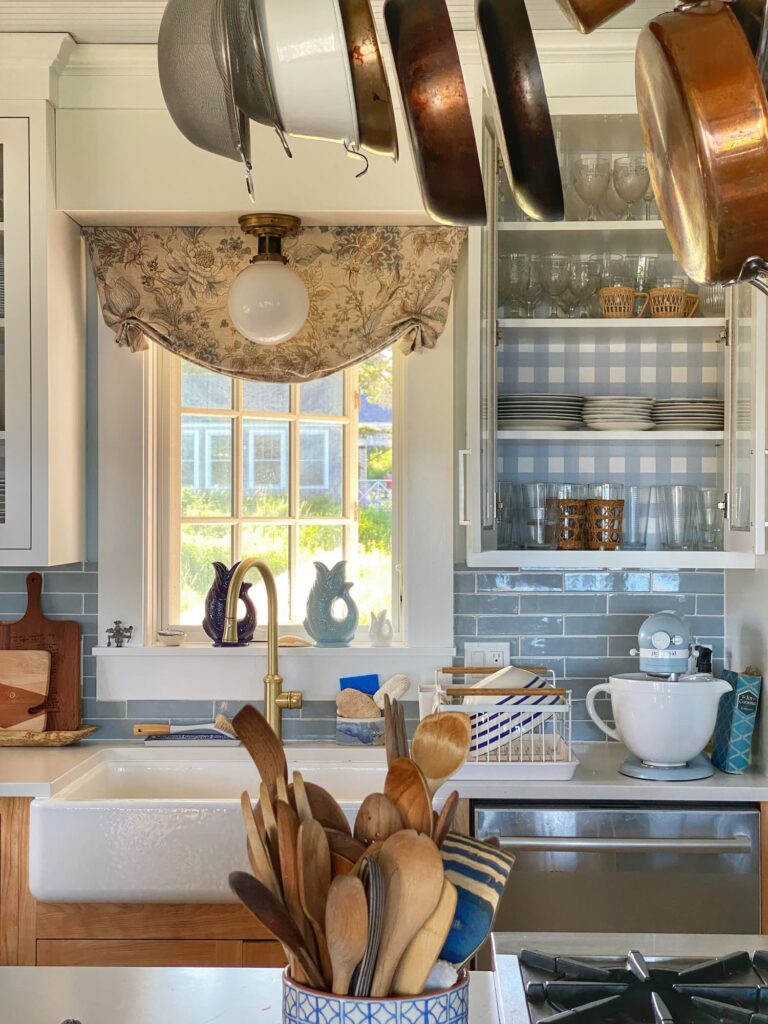
I switched out the peel-and-stick wallpaper on the back of my glass-front cabinets. Applying paper to the back of your cabinets is an easy way to add some color, pattern, and just plain fun to a storage space. It also makes your dishes pop!
Keeping with the blue and white check theme, I went with a large gingham pattern that I ordered from Spoonflower. They have a huge selection of unique patterns. This particular one was designed by Danika Herrick. I have linked it just below!
SHOP:

Hanging peel-and-stick wallpaper in a small space like a cabinet can be a little tricky. The sticky backing attaches immediately to any surface it touches. The good thing is, you can just peel it off and start over. I found it easiest to do the space between each shelf individually. The linear pattern of the check actually helped me keep everything straight!
Again, patience is key!
I am so happy with how it turned out! I smile every time I open the cabinets!
A Few Other Details
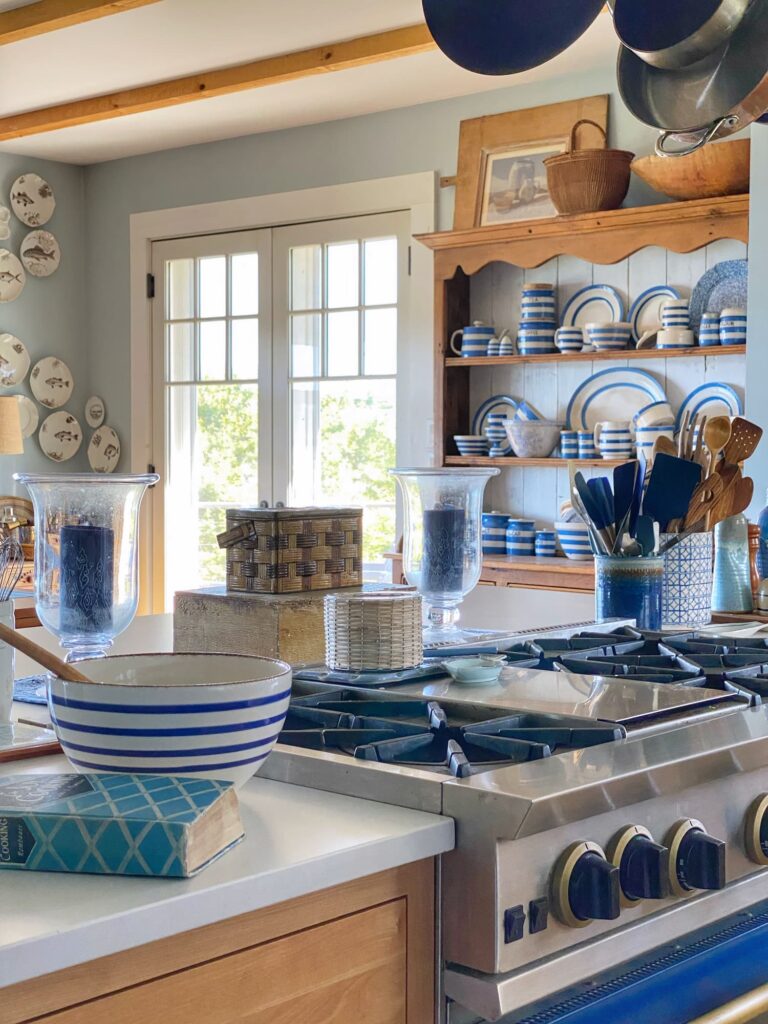
Now that the floor and the backs of the cabinets are blue and white, I wanted to add back in some more texture and neutral touches to the kitchen.
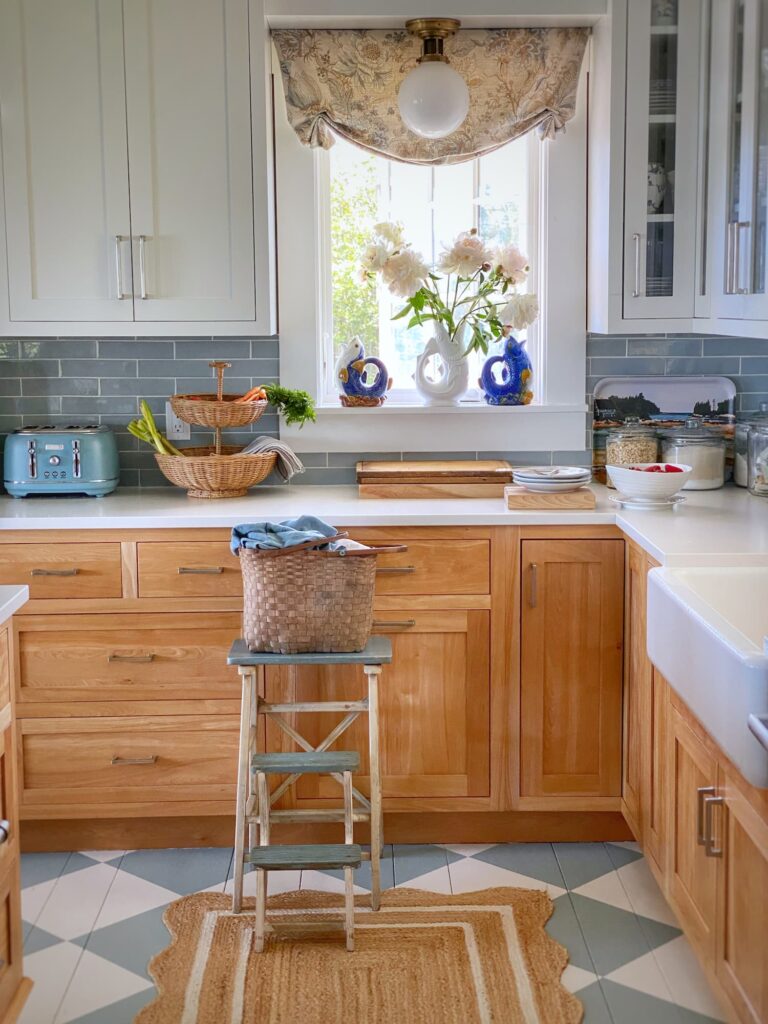
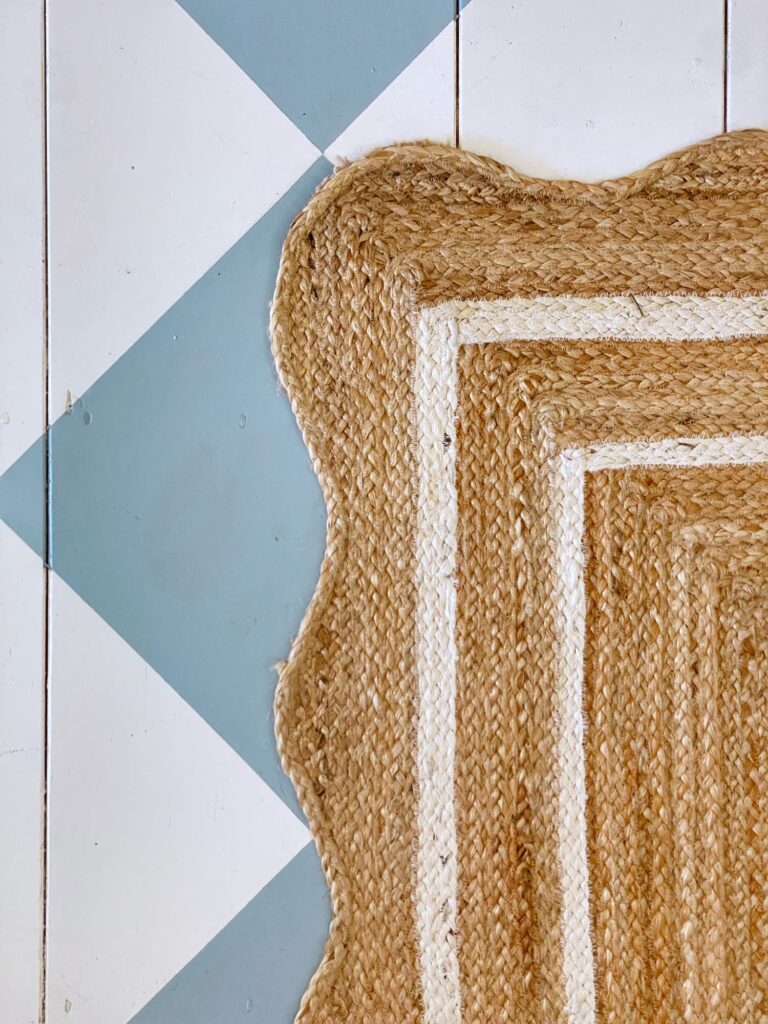
To complement the new floor I ordered a jute runner from Etsy. It shipped directly from India! I love how the whimsically curved border contrasts with all the straight lines in this space.
SHOP:
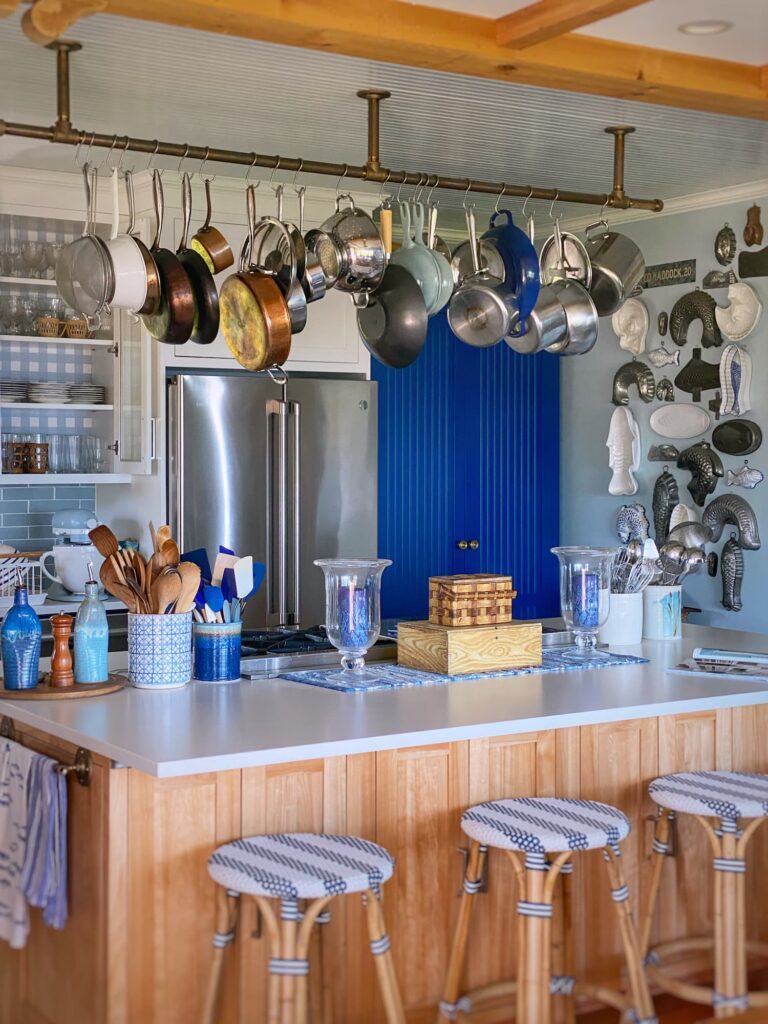
A wicker tiered stand adds texture and storage space for fruits and vegetables to the countertop.
SHOP:

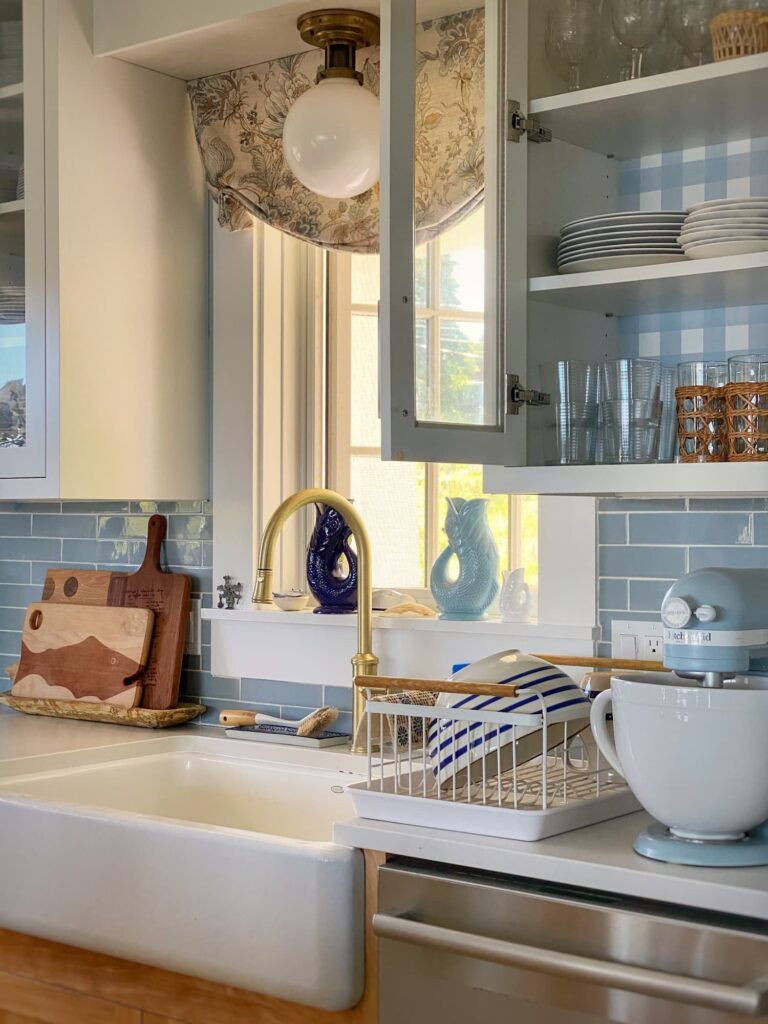
Since I am spending more time admiring the insides of my cabinets, I decided to update and unify my glass collection with new tall, low, and juice glasses in a simple striped pattern.
SHOP:
And I had to add in a bit of texture in the glasses cabinet too, with a set of four wicker-covered tumblers.
SHOP:
My Kitchen Refresh
So there you have it — all the details of my little kitchen refresh!
I hope this post encourages you to sometimes make those bold design decisions.
And maybe paint a floor in your home!
I am so happy I made the leap. It transformed my kitchen.
It just feels right, when before it didn’t quite.
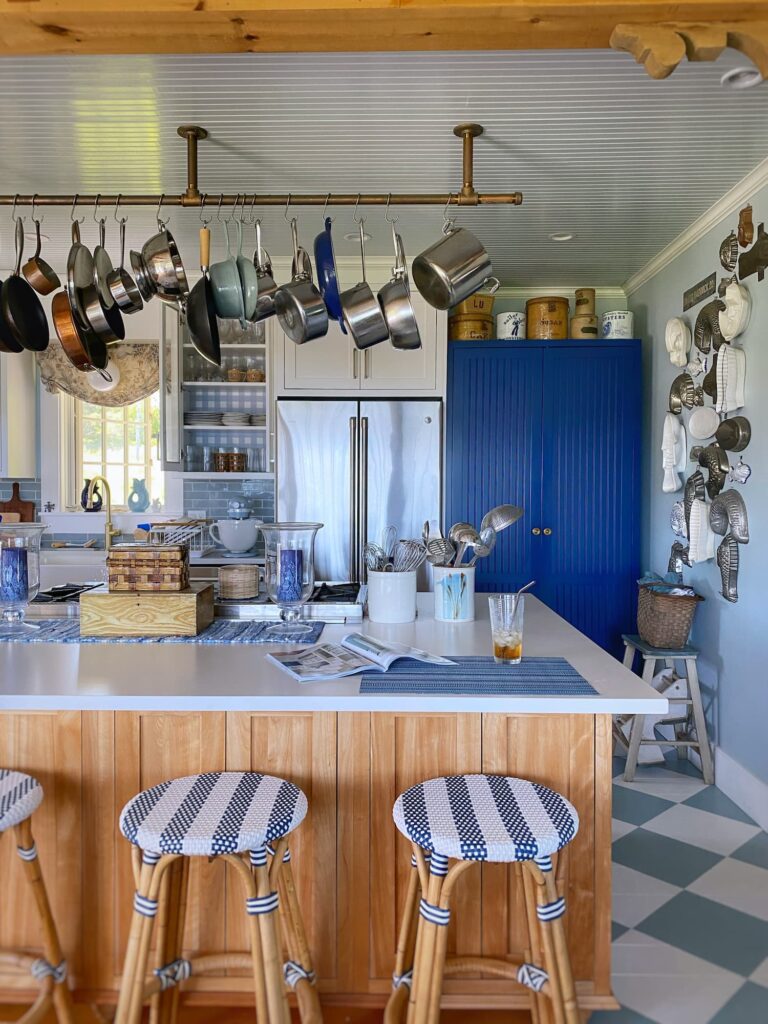
The floor now accents the natural wood cabinets instead of blending in with them. And I love how you can still see the character of the random width boards with their old-fashioned nails.
The whole space feels lighter and brighter, and makes me happy.
And that, really, is what design is all about!
Now, what floor should I paint next???
Happy summer and be well, friends!

Questions, comments, or just want to say hello?
I’m always happy to hear from you.

Hi Molly …
I read your post !!! I am envious of your patience !!! I do paint 🎨 but this is hard work and truly a sign of how much you love your home !!! 💙💙💙💙
Hi Cindy! Thanks for reading and taking the time to say hi! I too struggle with patience, but I was motivated by the desire to create something beautiful in my home! I am so happy with how it pulls the space together!
Wow, Molly, this is the world’s most darling kitchen. Just brilliant! Thank you for taking the time to go into such detail for those of us who might want to give it a try. Have a beautiful weekend!
Thank you, Annabelle! Are you thinking ofdoing something like this?! You have a lovely weekend too!
Just love it! You are so talented! I look forward to your post every week and follow you on Instagram everyday. Thanks for your continued inspiration!
Thanks for all your support, Debra! It means so much to me, especially with all the Instagram “shenanigans” these days!
It all looks fabulous! Well worth all of the attention to detail. I can’t wait to see it person.
Thanks, Liss! You aren’t allowed to walk on it, though. Kidding! Looking forward to your visit!
I love this and love how you decorate all of your cozy home. We are kindred spirits. I also have a love of blue and white. My kitchen is blue and white and also my studio/craft room. I painted a floor rug in my studio that I just love and as it ages with the wear and tear marks it looks even better 😊
Thank you, Sally! Your “rug” sounds fabulous! I feel the same way about things as they take on the patina of age! `
This is perfection!
Thank you, Deb!
That was surely a brave undertaking because it is a permanent change and it was rather labor intensive. Yay for you!!!! It looks amazing😍
Thank you! As I said, I did hesitate before making that first brush stroke! But I am so glad I trusted my vision. It is exactly what this space needed!
Molly!! I love it! We have a blue and white checkerboard floor at our home on the Chesapeake, and I did a black and wood checkerboard floor in my shed. You are a hurl after my own heart!! ◽️◼️◽️◼️
We are certainly two peas in a pod! I love the checkerboard in the kitchen, but if I paint another floor, it will be solid. It was a lot of work!
It looks fantastic!!!! I think you have definitely achieved your goal of making a new house look older. I love it- thanks for sharing
Thank you, Donna! I am so happy you think that and appreciate you reading my blog!
Love your floor and cabinets!
My husband painted our screened in porch floor in blue and white too. I had him paint it all white, then a border, a brown edge, and then the diamonds. I wanted it to look like a rug on a dark brown floor which it does. We used a chalk line to mark the diamonds. The bad news is that I’ve changed the color of the cushions to a teal color so…. We’re going to have the house painted so the painter can paint the floors a solid color and I’ll put a rug down.
We just returned from our first cruise (120 people) that went from Dublin to Bergen, Norway. One of the stops was the Isles of Lewis and Harris and the black houses. I took a picture of it inside because it made me think of you because of some Cornish dishes on display. Ya never know who or where someone’s thinking of you!
Hi Pam! Your porch “rug” sounds wonderful! I am a little sad that it will be painted over! And thank you for your thoughts! I love it when someone says something they saw made them think of me. I will take all those good thoughts headed my way!
This is quite a big project(s) it is Amazing.
Love the floor and the inside of the Cabinets
Thank you, for sharing the details., Beautifulllll
Hi Karen! Thanks so much! It was quite a project! Glad to have it behind me and now I can enjoy the results!
Love the floor! It sure turned out beautifully and the wallpaper adds an extra element of design as well. I enjoy your Saturday posts, thank you for sharing your home with us
Thanks, Traci! I am loving how the floors, tile backsplash, and cabinet wallpaper work together! Thank you for joining me here on the blog!
I love how the new look on the floor and cabinets work together!
Thanks, Beth! I like how the tile backsplash plays with those two elements too!
You are a brave woman and I so admire your spirit and your desire to have an authentic Maine cottage. You nailed it with that floor! Maine is my dream place. I visited many times in the 80s traveling up and down the coast and a bit inland, staying at bed and breakfast inns. I fell completely in love with it. I thought I had my husband talked into moving there, in spite of the cold weather when the pandemic hit and everyone went crazy trying to move there. Now the price of housing has pushed it out of reach for us. But I will hopefully visit again one day soon. I very much enjoy reading about and seeing the photos of your lovely Maine cottage and lifestyle. Your home reflects all that I love about the quintessential Maine cottage.
Thank you so much, Vicki! I appreciate that you understand the look and feel I am trying to achieve here. Our timing for both the purchase and construction was so lucky. We too could not afford our property or to build a home here now! So grateful for our place here!
I must admit, I’m a bit torn. I love the old look pine floors. That said, I also love the painted floor. It seems to lighten the space a bit, and that shade of blue works really nicely. Great job!
Thanks, Lynda! There are still plenty of natural wood floors in the house! The kitchen floors are in better shape than some other areas, which are really quite damaged already. And that is definitely not a good look. I do like how even painted, you still get the look of the random width boards and old fashioned nails.
Molly I love the floors so much. My dad did something similar here in the sunroom but we ended up stripping it when refinished the floors. I can’t believe you did this. Awesome💙
Thanks, Ann! Kitchen needed a little boost! I am so happy with them!
I have to say when I first read a few weeks ago you were painting your floors I thought OH NO, but your instincts and design vision were perfect. It all flows so perfectly and you met your objective of a lived-in older Maine home…not that I’ve ever been in a Maine home, but I take your word for it. The wallpaper was the cherry on top. I’m glad you had the courage to take that first brush stroke…you knocked this one outta the park. I know there are lots of folks measuring off their kitchens this very minute. Also thank goodness for those engineering/math savvy kids…every family needs one.
Thank you, Julie! But, how could you, of all people, doubt my vision?! Kidding! I am glad I didn’t disappoint with whatever you thought I was doing with my painted floors. 😉 The kitchen is finally all pulled together!
You’re incredibly brave…and talented. It’s an an amazing update and really does change everything. It never would have even occurred to me to do that, that’s a gift you have.
Thank you, Pamela! I did hesitate before making that first brush stroke, but I am so happy I went through with it. It really pulls the kitchen together!
Molly I’m so impressed with your floors. I’m sure this was hard work and took patience & stamina to complete. I just love the look of painted floors. I did this when we first moved into our home when the color deep mustard yellow and the primitive style was popular. I painted the old fir floors in that yellow. I didn’t seal it either. We had our big young family at the time and we really beat the heck out of that floor. it was very hard to maintain with so much foot traffic so we ended up putting ceramic tile over it. I really like your jute rug and the great idea of putting wallpaper in your cabinets. The gingham looks fresh & fabulous. It’s so exciting seeing your home projects!
Hi Nori! Thank you! I am hoping it wears okay — it is a special oil/latex paint that is supposed to be very durable. I figure I can just touch the paint up if I want to. The wallpaper in the cabinets was some fun frosting on the cake! Thanks for all your support!
Squeal! I love your kitchen floor! We have 100 year old pine floors (yellow pine not heart pine) and when repairs were made a few years ago, we opted to cover the floors with carpet because she was having trouble walking on them. When we pull up the carpet, I am going to paint them. Thanks for your tips!
Hi Jane! I am so glad I bit the bullet and painted this floor! And now I am wanting to paint more floors, ha!
I meant to explain that it is our elderly dog that has trouble walking on wood floors.
I get it! 🙂
This is my first visit and what a visit it has been! We are in the planning stages of our kitchen remodel, and I’m still gathering ideas. I fell in love with your birch cabinets, those floors really set the stage for your cabinets. I’m not sure I’m brave enough to paint floors, but I love them none the less.
Hi Cara! And welcome to Maine! I had these exact same red birch cabinets in our previous home — uppers and lowers there. I loved them so much, I chose them for here too! And yes, it took a lot of nerve to paint the floor, but I am so glad I did! I know it is not for everyone, though!
Oh, so charming…truly, the whole house makes me smile…but those floors! What a fun surprise and perfect for your coastal vibe!
Thanks so much, Rosie! It is a happy home and the floors are a fun surprise when you round the corner into the kitchen!
It looks so good! Congratulations on overcoming that moment of hesitancy and just going for it. What a reward! ❤️
Thank you, Lisa! Thank heavens I didn’t mess them up, haha! Sometimes the outcome does not match the vision, but I have to say this time it surpassed it!
Great job! I have been thinking about doing something similar since I moved into my home last July! I think your project has given me the encouragement I need!
Do it! You will be so happy you did! Let me know if you have any questions that I didn’t answer in my how to!
I think you did a beautiful job, Molly! What great colors and what a great accent for your kitchen. I can see it was A LOT of work. I just stenciled an accent wall for my guest bedroom and it took me quite a while, so I can’t imagine doing your own calculations for every “tile” and all of that. Did you ever consider a stencil? They make the job a bit easier, I think, although still time consuming. Anyway, I love your floor! Thanks for sharing!
Thank you, Natalia! I bet your stenciled wall looks great! I would have had to make my own stencil, since the squares aren’t a standard size to fit my space. And you get a crisper line with the tape.
Just now getting round to reading this, Molly, and I am so glad I did take the time to read it! I absolutely love what you have done! We are saving for a kitchen redo. I want the modern option of pull-out shelves/drawers on the lower cabinets and want the upper cabinetry to go to the ceiling instead of stopping about 10-12 inches below. We are still in planning stages but I think your painted floor and cabinet wallpaper ideas will make it somewhere into our plan. Thanks so much for sharing!
Hi Beverly! So glad you enjoyed this post! I am working on a post today that has all the details of our kitchen — you might find this post helpful too!