
Today I’m sharing step-by-step directions for how I hung the perfectly spaced grid gallery wall in my bathroom.
Without making any erroneous extra nail holes!
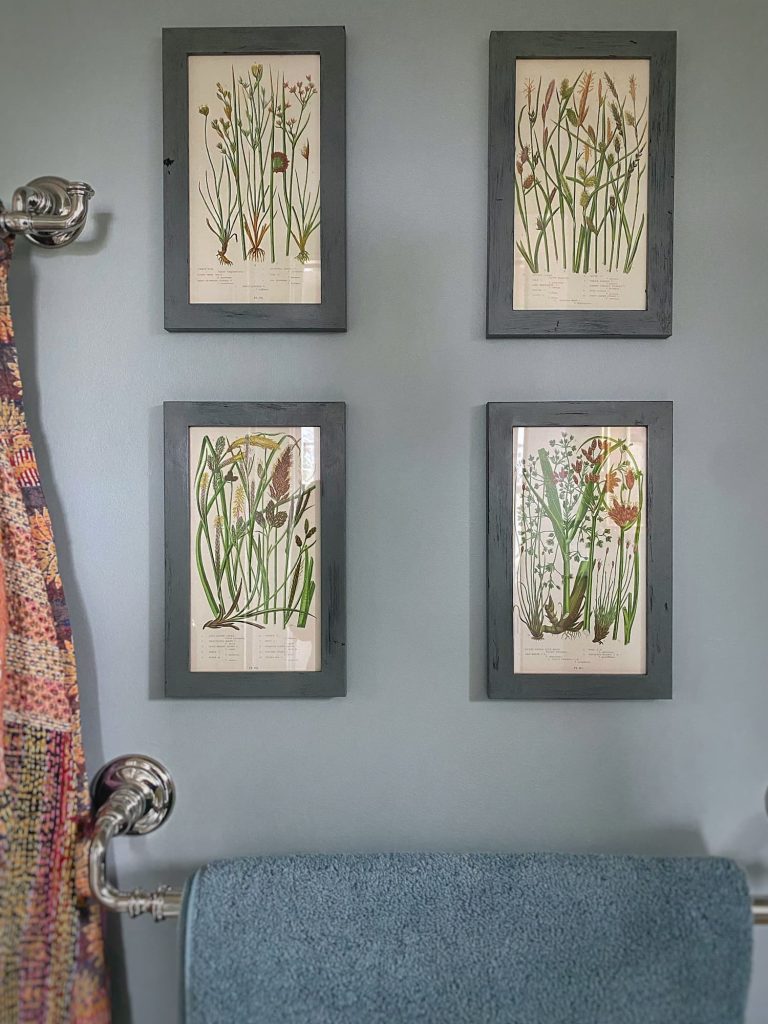
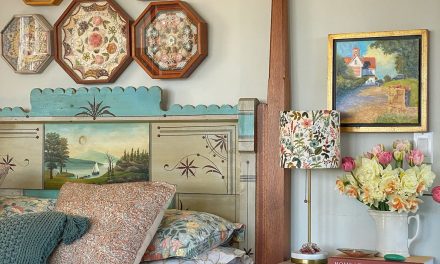
My Bathroom Gallery Wall
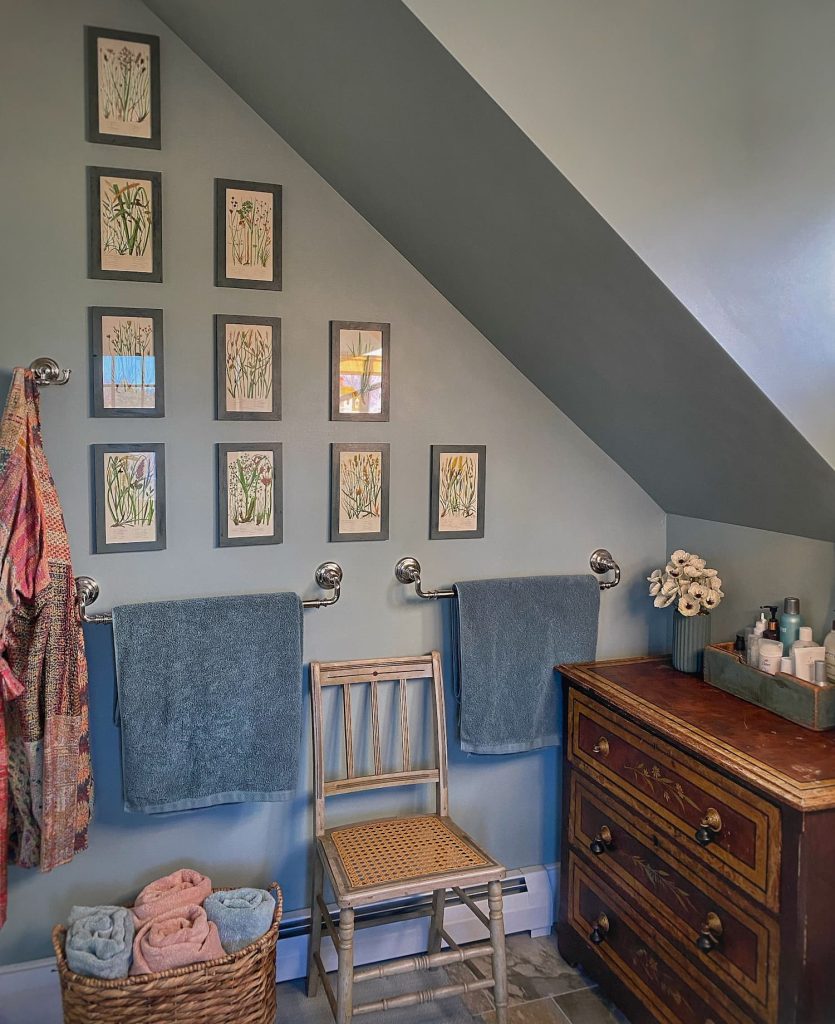
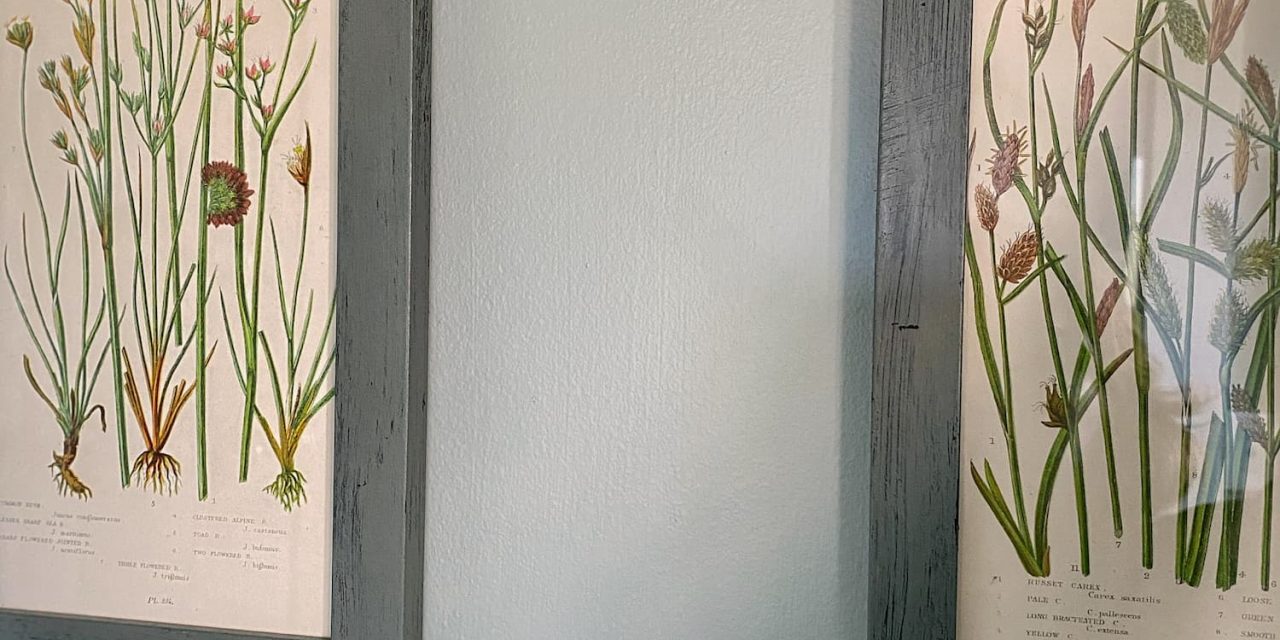
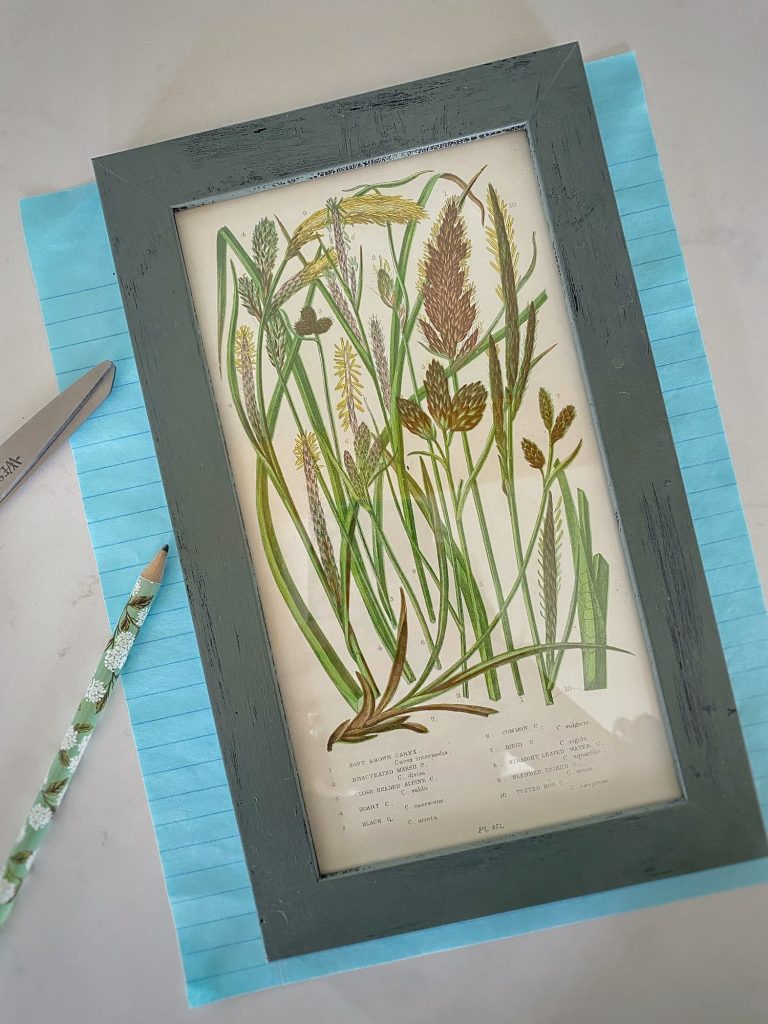
Did you see the gallery wall of old botanicals I hung in my primary bath?
I shared it in my most recent blog post Between Meadow and Marsh | My Coastal Maine Bathroom Inspired by Nature.
I love the focal point it created in this space!
Gallery walls are great for creating visual interest in any room in your home.
I wrote all about different types of wall decor in my two-part series: Creative Wall Decor Part 1: Art and Gallery Walls and Creative Wall Decor Part 2: Non-Art Displays
I have a number of different gallery walls in my home.
Some are artwork. Others are non-art, such as plates, architectural pieces, baskets, and even fish moulds!
Sometimes I like them to be symmetrical , and other times I let them flow naturally.
It depends on the size of what I am hanging and the kind of feeling I am going for.
A grid layout
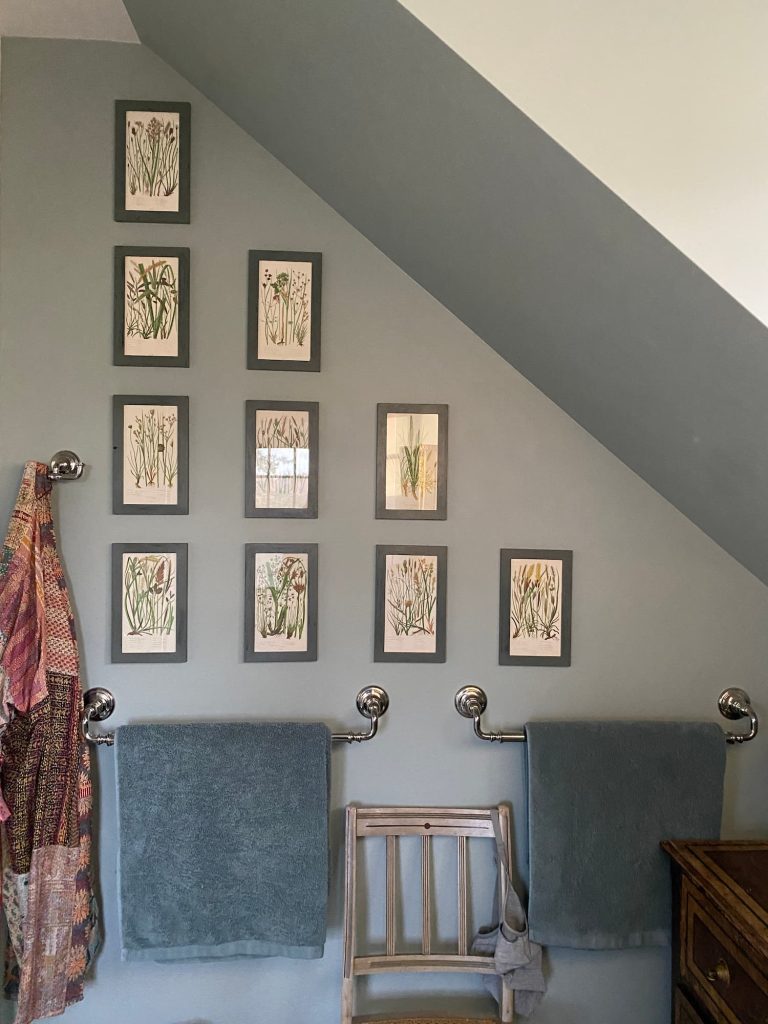
For the bathroom, I was using framed artwork that was all the exact same size. And I had a slanted ceiling line to contend with.
Therefore, I opted for a grid pattern — clean and exactly spaced.
The truth is, I struggle to execute this type of precision work, because I am a terrible measurer. I don’t know why, but I can measure something multiple times and it will still be wrong.
At the same time, if the completed project is just a little off, it drives my eyes crazy.
Not a good combination!
So, I have developed a method of checks and balances to line everything up perfectly.
If you are one of those people who prefer to just eyeball an arrangement like this, then go for it!
If, like me, you need some extra help, then I have you covered.
My method requires patience and attention to detail.
But I guarantee your grid gallery wall will be perfectly level and exactly spaced.
With no extra nail holes!
What You Will Need
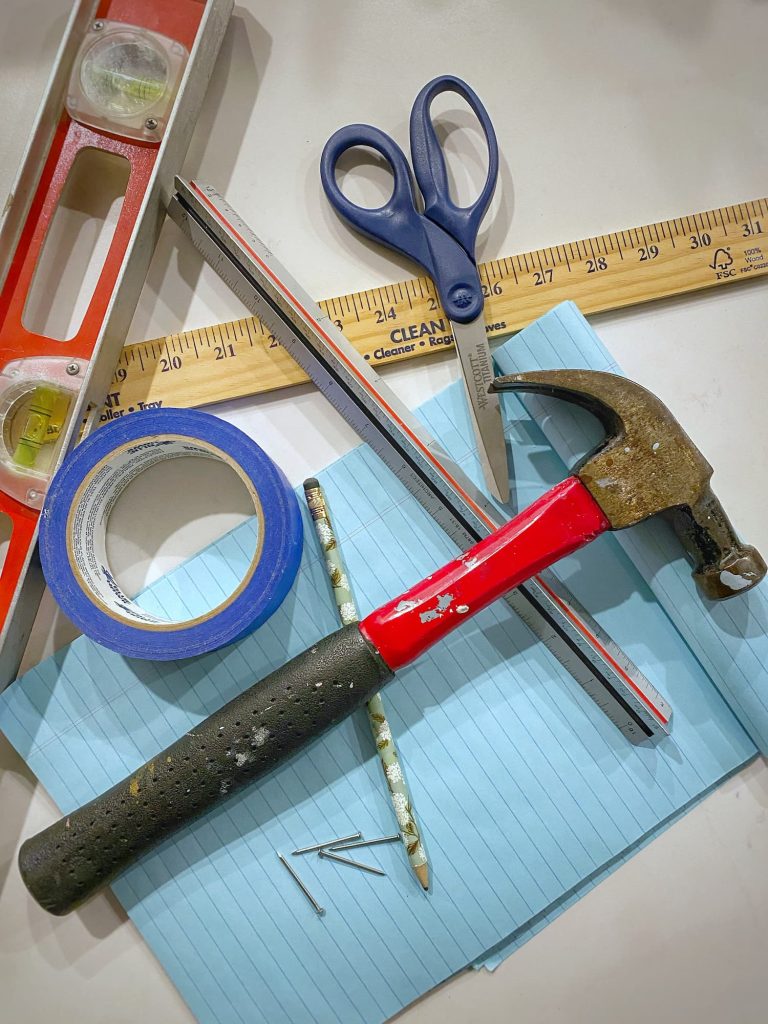
Here is what I used to hang my bathroom grid gallery wall:
- Paper: As large or larger than the frames you are hanging
- Scissors
- Pencil and eraser
- Painter’s tape
- Ruler and/or yardstick: I used both
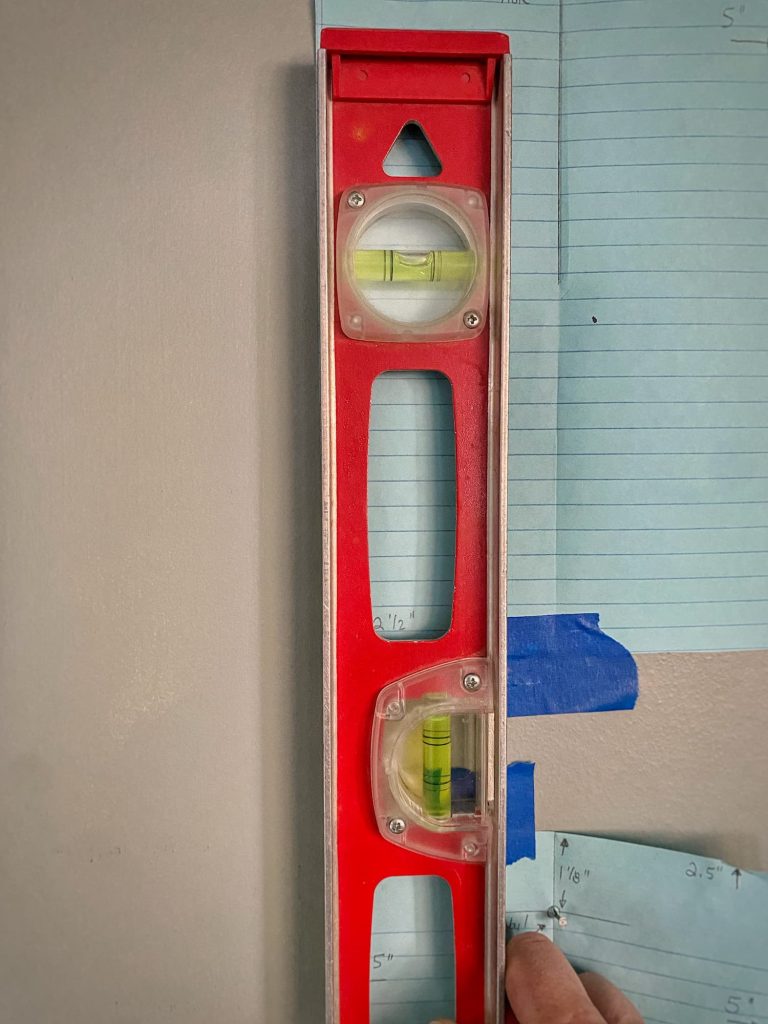
- A longish level: Mine is 18″
- Hammer
- Nails or picture hangers: My frames were small, so I used nails to hang. For heavier/larger items, use picture hangers.
Making Templates
Before you start hanging there is prep work to do which will make the hanging process a snap!
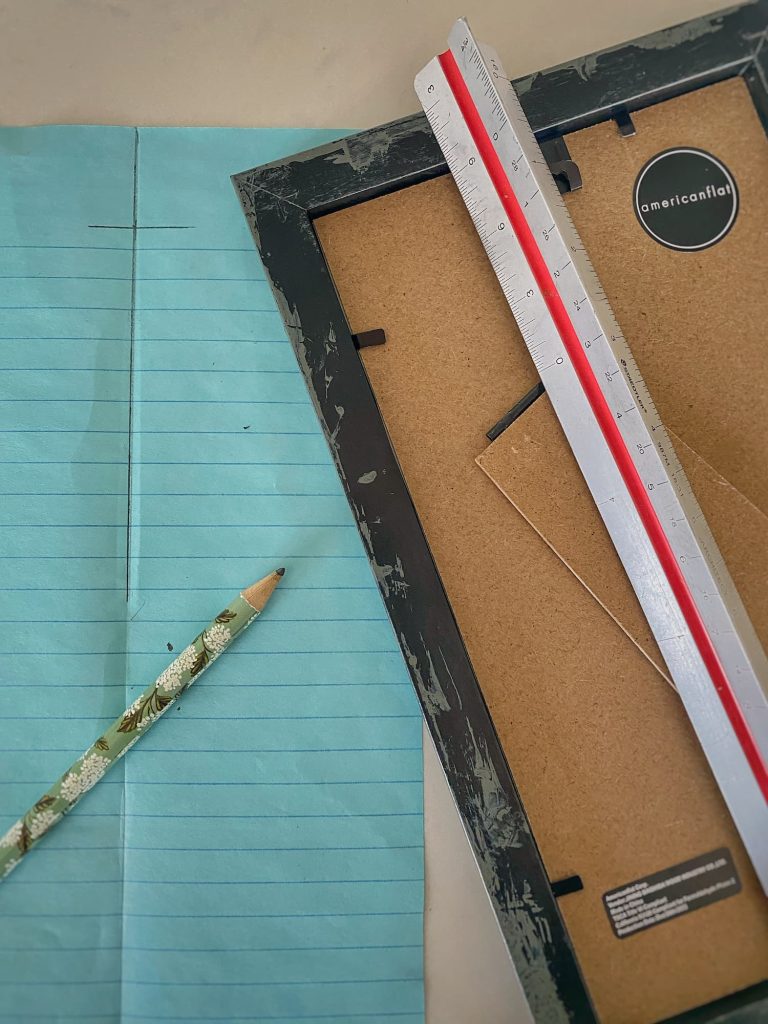
- Create a template for each frame by tracing around it on a piece of paper and cutting it out. Since my frames were all the same size, I was able to do this in batches.
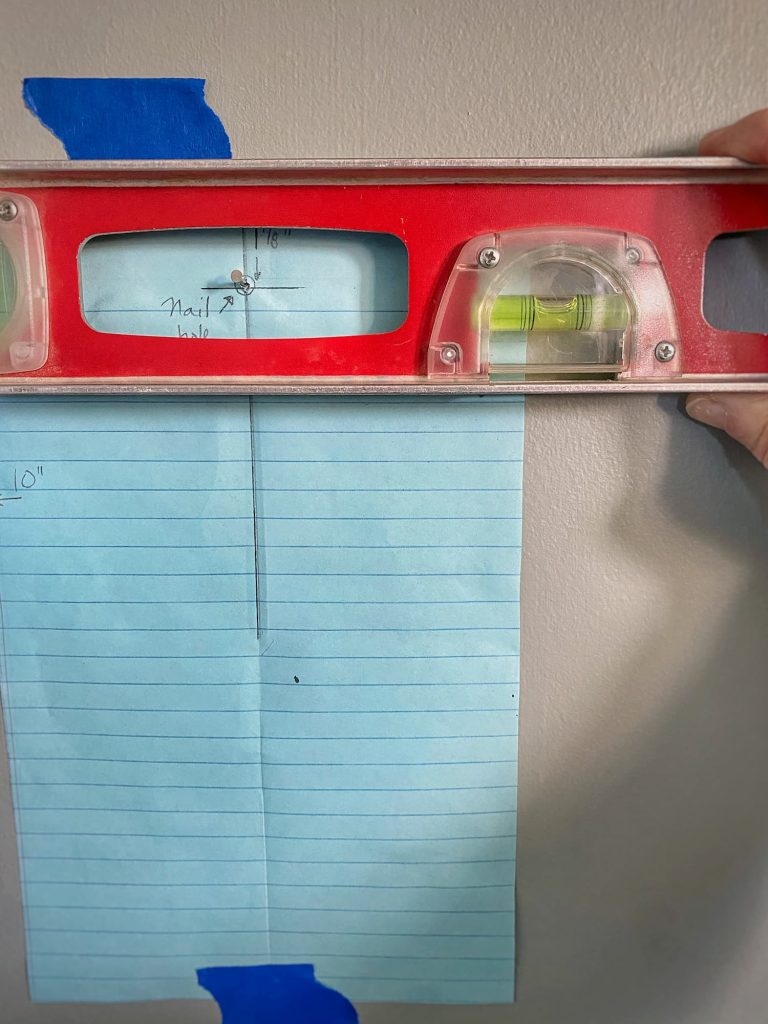
- Fold each template in half and then, using the ruler and pencil, mark along the top part of the fold. This is your center line
- Measure from the top of the frame to the bottom of the hanger on the back. Then mark this length on the center line of your template. It should form a + shape. This is where your nail will go.
NOTE: If your frame has a hanging wire, pull the wire up taut (as it would hang) in the center of the frame and measure from the wire to the top of the frame. The wire length might be different on each frame.
The Layout
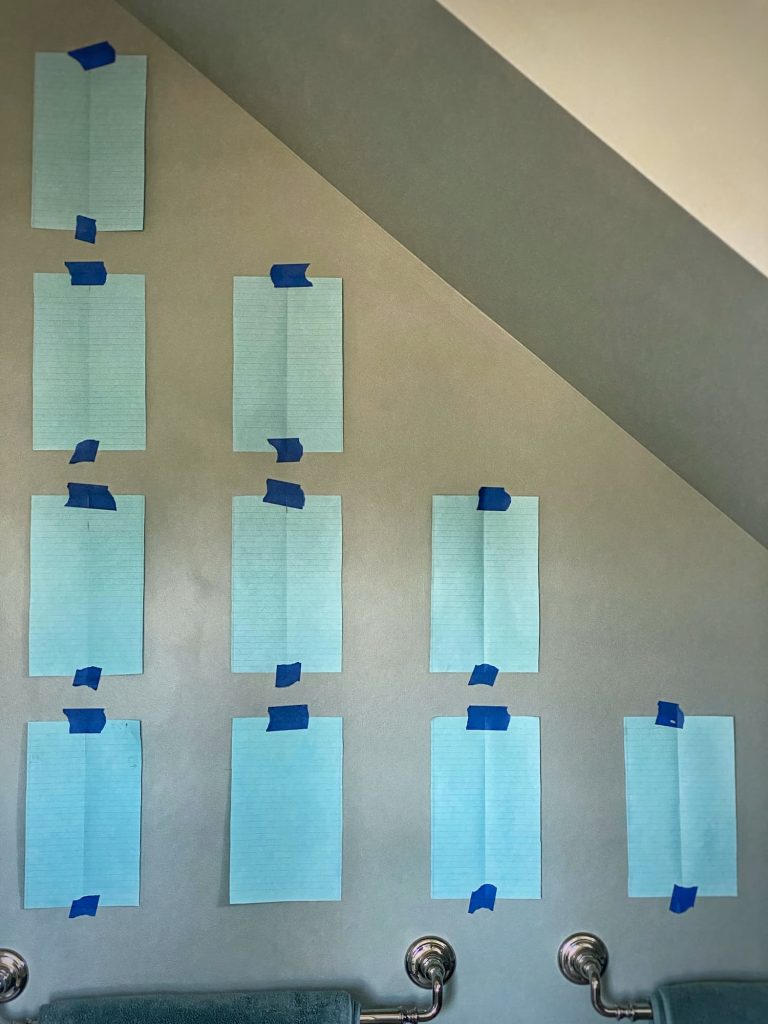
Now you are ready to figure out the layout and spacing!
I start this process by just eyeballing things. We will get to the exact measurements after the general layout is set.
This is where the templates really come in handy.
Tape them to the wall with painters tape.
Step back and see how it looks. Make adjustments, then step back again.
Keep going until you come up with an arrangement and spacing you like.
If you are a mathematical person and have a simple rectangular space, you could calculate the spacing before hanging the templates.
I was working with one angled side, so I found it easier to just get a general idea of spacing by moving the templates around on the wall.
Since I am a visual person, I do better with something physical I can see.
I started off trying a staggered pattern, but realized this was not going to work. Then I switched to the standard grid style, but I did shift the templates up/down and back/forth until I came up with the final spacing.
Even if you pre-calculate the spacing, I still recommend you use a paper templates. They make it easier to hang precisely.
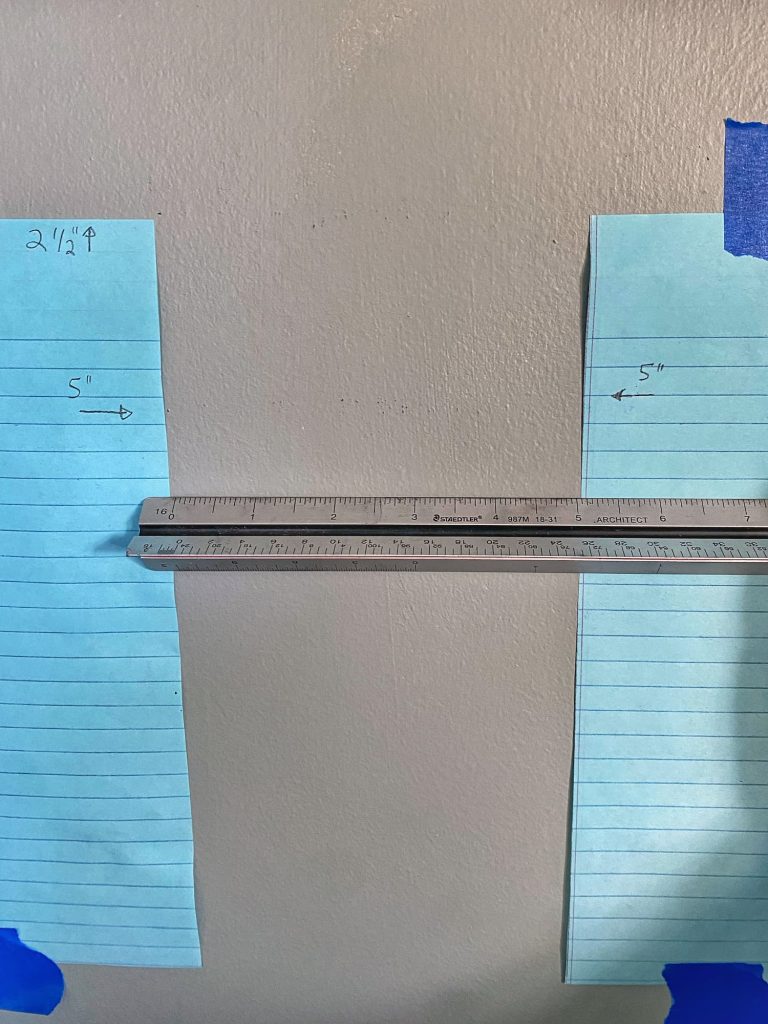
After all my fiddling, I ended up with the following spacing:
- Left side: 10 1/8 inches from the edge of the shower
- Right side: variable due to the ceiling slant
- Bottom and top: not measured, determined visually with the templates.
- Horizontal spacing between frames: 5″
- Vertical spacing between frames: 2 1/2″
Measuring (twice…and thrice)
Let’s get the exact measurements on the wall now!
This is the last step before hanging and the most important to ensure that your grid is evenly spaced and level!
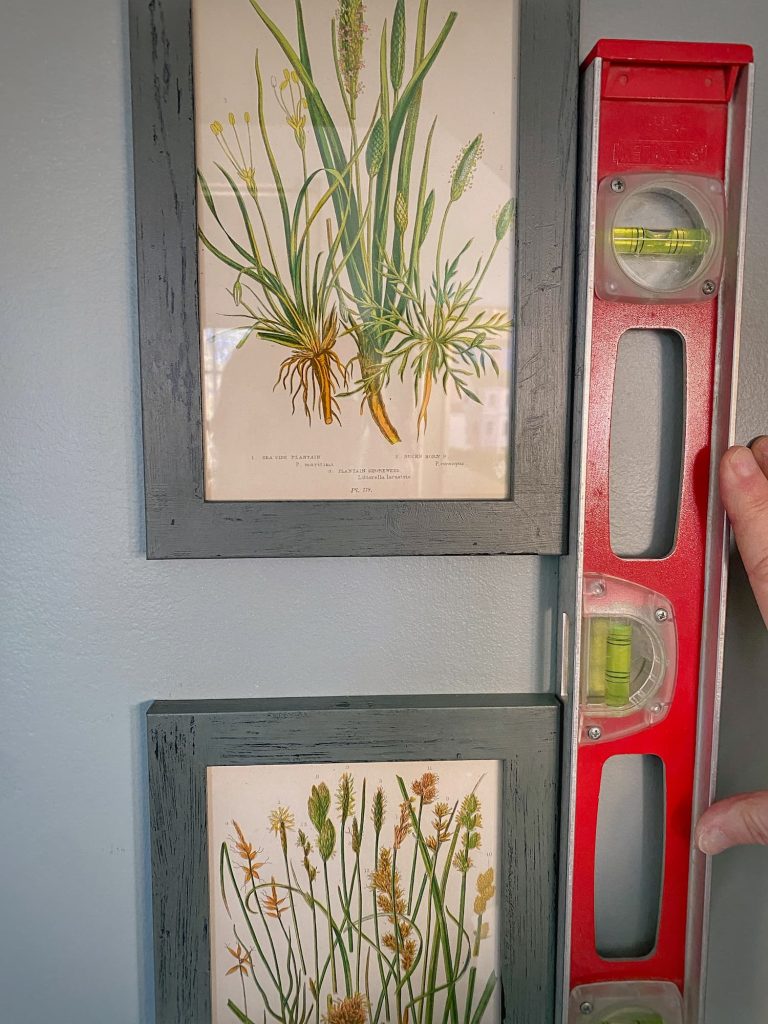
1. Hang Template 1
I recommend starting on the bottom left.
All measurements will be based on Template 1, so make sure it is located where you want it!
I hung my Template 1 just over 10″ from the shower and placed vertically on the wall visually.
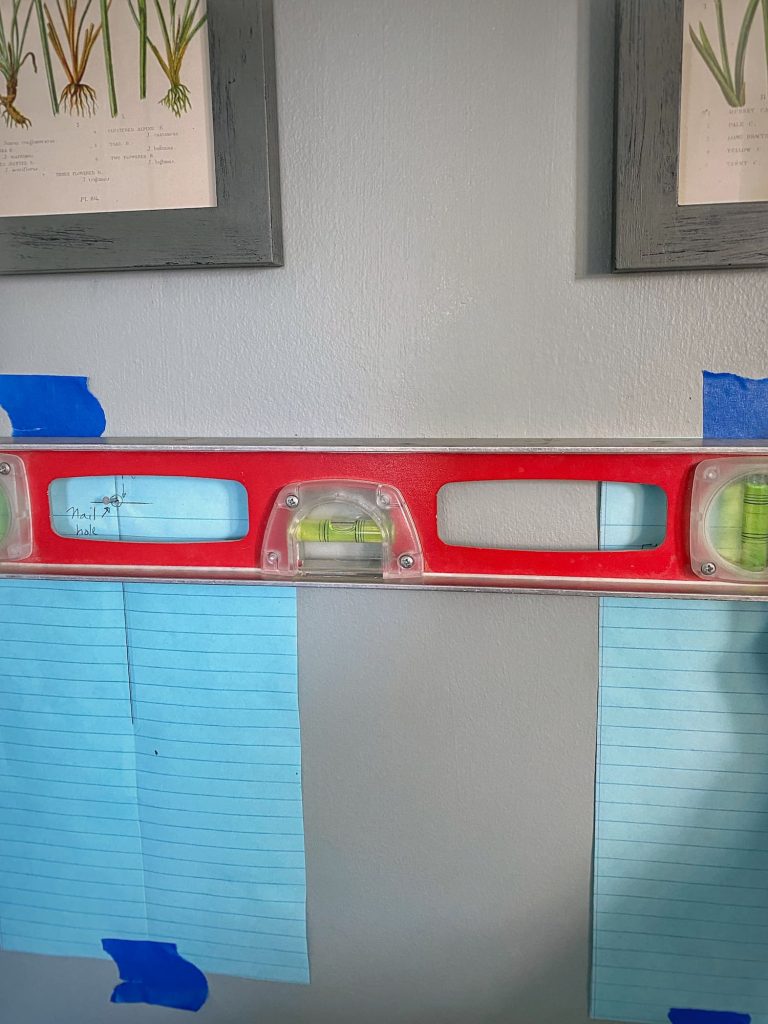
I used the level to make sure the template was hanging strait, horizontally and vertically.
2. Measure and hang Template 2
I worked row by row, left to right
From the right edge of Template 1, I measured 5 inches to the right in two spots and made two marks on the wall with the pencil. (You can erase these later, but they will be mostly covered by the frames.) This is the left edge of Template 2.
Then, placing the level along the top of the first template, I made three marks in the spot for Template 2.
Hang Template 2 by lining it up with all the marks you have made on the wall.
Double check the measurements and, using the level make sure it is hanging straight horizontally and vertically. Also use the level to ensure Template 1 and Template 2 are also hanging straight horizontally with each other.
The level is your best friend!
Using this same method, and always double checking measurements and straightness, hang the rest of the templates in row 1.
3. Hanging the templates in the second row
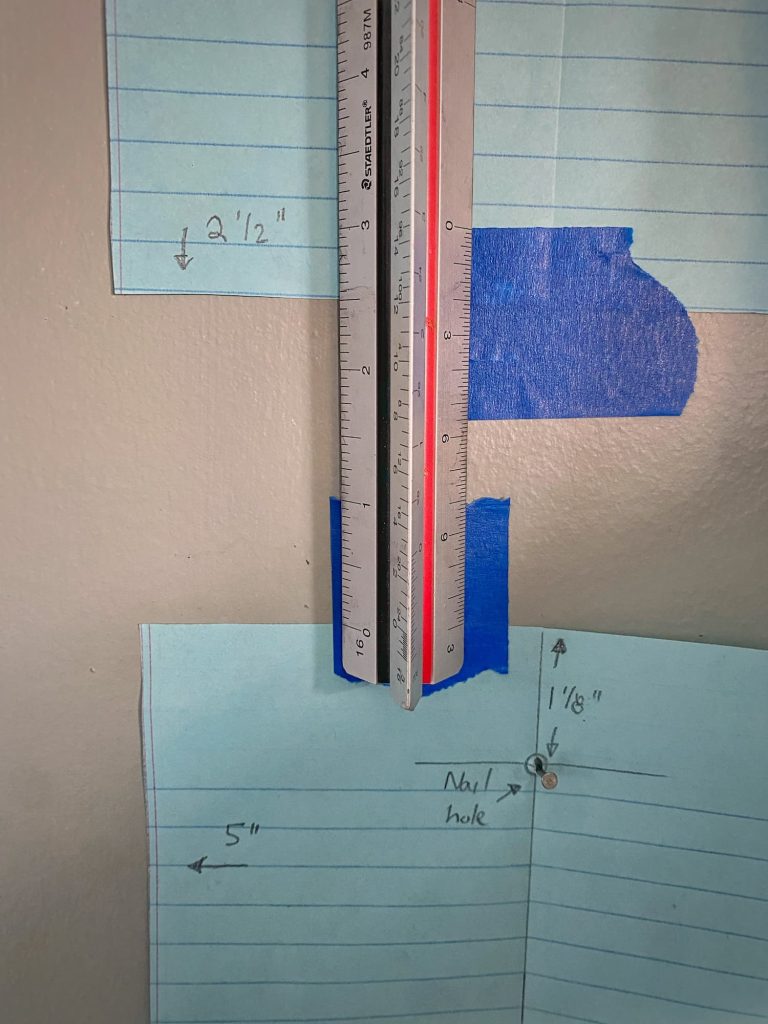
To transition to Row 2, I measured up 2 1/2″ from the top of Template 1 and made two marks on the wall. This is the bottom of the first template in Row 2.
Then holding your level-friend vertically along the left edge of Template 1, make three marks in the area of the first template of Row 2.
Hang the template by lining it up with the vertical and horizontal marks.
Before moving on to hang the next template, always ensure the spacing is correct and that all templates are hanging level, horizontally and vertically, both by themselves and with the templates on all sides.
Proceed to hang the rest of the templates in this same manner.
I know I am recommending a lot of double-checking, but for something this precise, I don’t think it is overkill.
And like I said, I am a terrible measurer, so I always need to check, and re-check!
When you are done hanging the templates, I would recommend checking everything again! It can’t hurt!
Hanging
This is the easy part!
You have done all the work!
Now all you need to do is to hammer a nail into the middle of the + shape you drew on the templates way back in step 1.
NOTE: If you are using a picture hanger, position the bottom of the hanger at the + shape, and hammer in the nail.
Of course, cautious as I am, after the first few nails went in, I hung the frames over the templates to make sure they were lining up correctly.
All my measuring, leveling, and double-checking paid off! My frames all hung perfectly!
Before final hanging, just pull the templates off over the nails.
Hang your frames.
Step back and admire! Take a few photos! Send to friends and family, plus Molly in Maine.
Post on social media!
Finally, be sure to stop by the room frequently to appreciate what you have accomplished with your handiwork and creativity!
Bravo!
A Few Final Notes

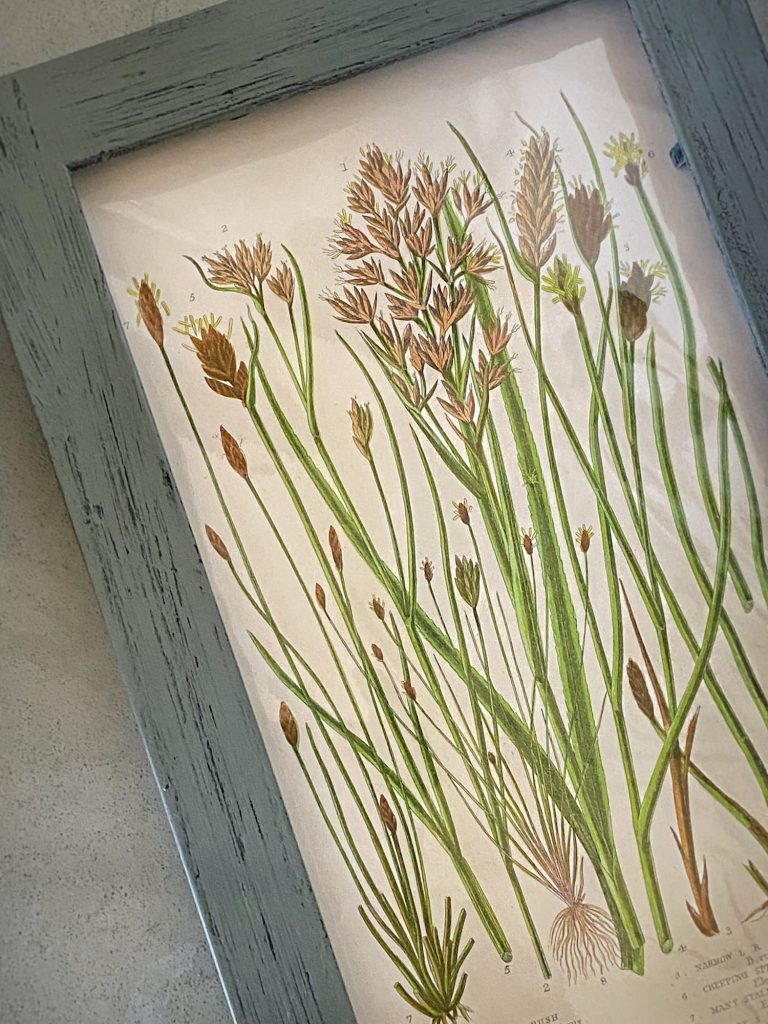
My prints were pages from an antique/vintage book so they were not a standard size.
I figured that, if I trimmed the prints, a 5×9 frame would work.
This is also not really a standard size, but I found them on a few online sites. I ordered mine from AmericanFlat. (They were twice the price on Amazon.) These are very basic black frames made from engineered wood.
I talked a bit about how I painted them in Saturday’s blog post.
Trimming the prints to fit the frames was easy!
Just remove the glass and place it over your artwork, centering it as you want.
Then trace around the glass with a pencil, and cut out with scissors.
A perfect fit!
See You On Saturday!

I hope this tutorial has been helpful to you. Please let me know if you have any questions!
And certainly, if you use it to hang your own grid gallery wall, I would love to see a photo!
As I finish up this blog post, I am already planning for Saturday’s.
Phew! There is a reason I usually only post once a week!
We have had a beautiful week here on the Maine coast!
You can see the spectacular rainbow we had over the water on Wednesday night!
And even though we got down into the 20’s that night, it is finally starting to feel and look a little bit like spring.
I will be sharing some signs of spring — inside and out — on Saturday.
See you then!


Molly! First of all I love your gallery wall of botanicals. Second I’m in awe of your process. I’m a disaster at this kind of thing but thank god Jim is more patient and analytical. I’m saving this for the day I finally find the right art combination for our bedroom. You’re brilliant and the extent of your talents knows no end. I still like you. xo
Hi Juliet — You are way too kind! In my enthusiasm I tend to rush into things without stopping to plan or read directions. But in the case of a gallery wall like this, I have learned that if I work through it carefully and methodically, it makes a huge difference in the outcome. You always blow me away with your constant and seemingly effortless style, but I still like you too!
Molly, your botanical wall is beautiful. I loved it when I first saw it last week. Vintage botanicals are one of my all-time favorite things. I am especially partial to the botanicals of Elizabeth Blackwell.
As for your gallery wall…I can relate. I am challenged by measuring as well. I typically just “eyeball it” and then am left with the consequences. Thankfully my husband is more exacting and particular. He now hangs all of the art.
Have a great day Molly!
Thank you, Elizabeth! I find hanging a gallery wall this way tedious, but if I eyeball it, it is a mess. And I am always so pleased that everything is lined up perfectly. So it is worth it to me. I loved how these botanicals were all grasses. Different!