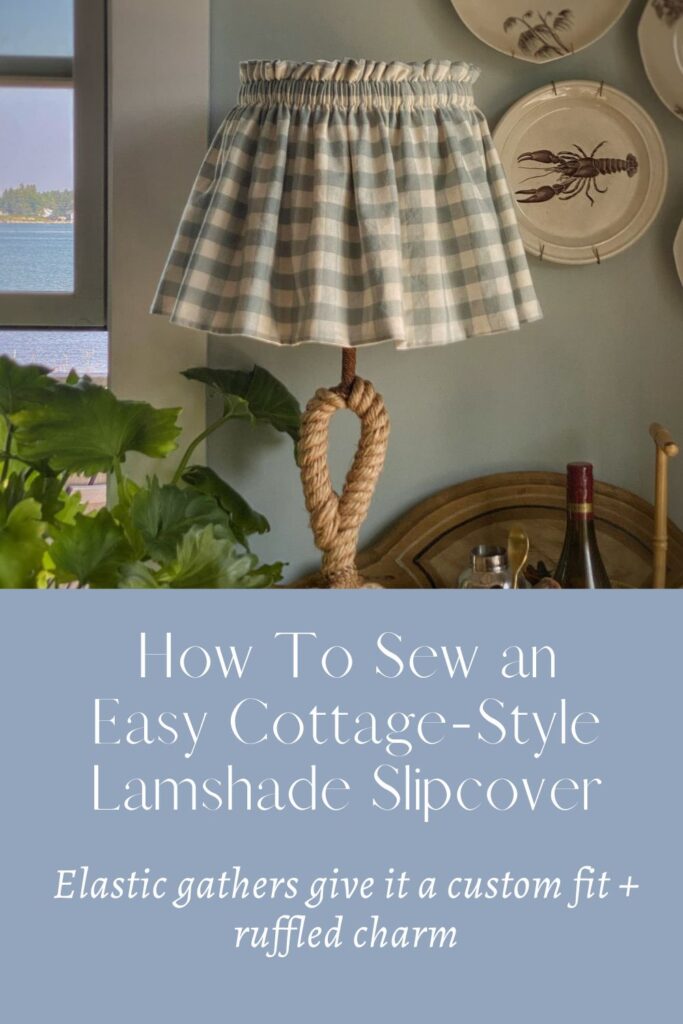
How to Sew an Easy Cottage-Style Slipcover for a Lampshade
I sewed an easy cottage-style lampshade slipcover—here’s a quick how-to using elastic for a custom fit, plus a little summer tick talk.
July’s Final Blog Post
Can you believe this was the last full week of July? The month has flown by!
I have friends visiting for a long weekend, so I’m keeping this week’s blog post short and sweet. I know many of you are busy too—thanks for making time to stop by!
Let’s talk lampshades!
I’ve always loved dressing up a lamp with an interesting shade. It’s such a simple way to perk things up—and of course, it’s a great way to bring both color and pattern (two of my favorite things!) into a room.
Lately, I’ve been noticing a new-to-me style of shade: a fabric slipcover that fits right over your existing lampshade. It’s a fun way to refresh a lamp—or even switch things up seasonally.
You might remember the box-pleated slipcover I sewed last year. I even wrote a tutorial for it. I still love its tailored details, but I’ll admit—it was a bit of a complicated project.
Recently I sewed a shade cover with a similar relaxed cottage look, but it was much easier to make. The secret? A band of elastic at the top to create the gathers and give a custom fit.
Today I’m sharing all the details—plus an easy how-to.
It’s the perfect little project for your next rainy summer afternoon!
P.S. I also had to deal this week with the aftermath of a recent unwelcome guest—a tick. Stick around after the lampshade how-to for a quick note on Lyme disease and general tick safety.
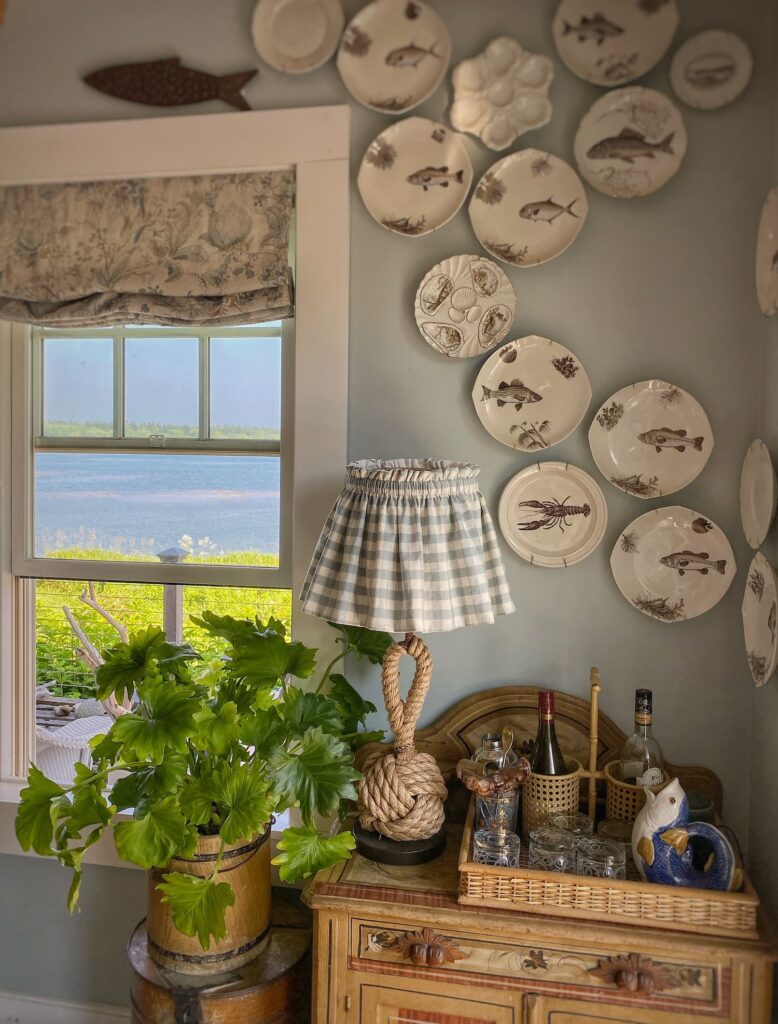
A Sweet Slipcover for a Rope Lamp
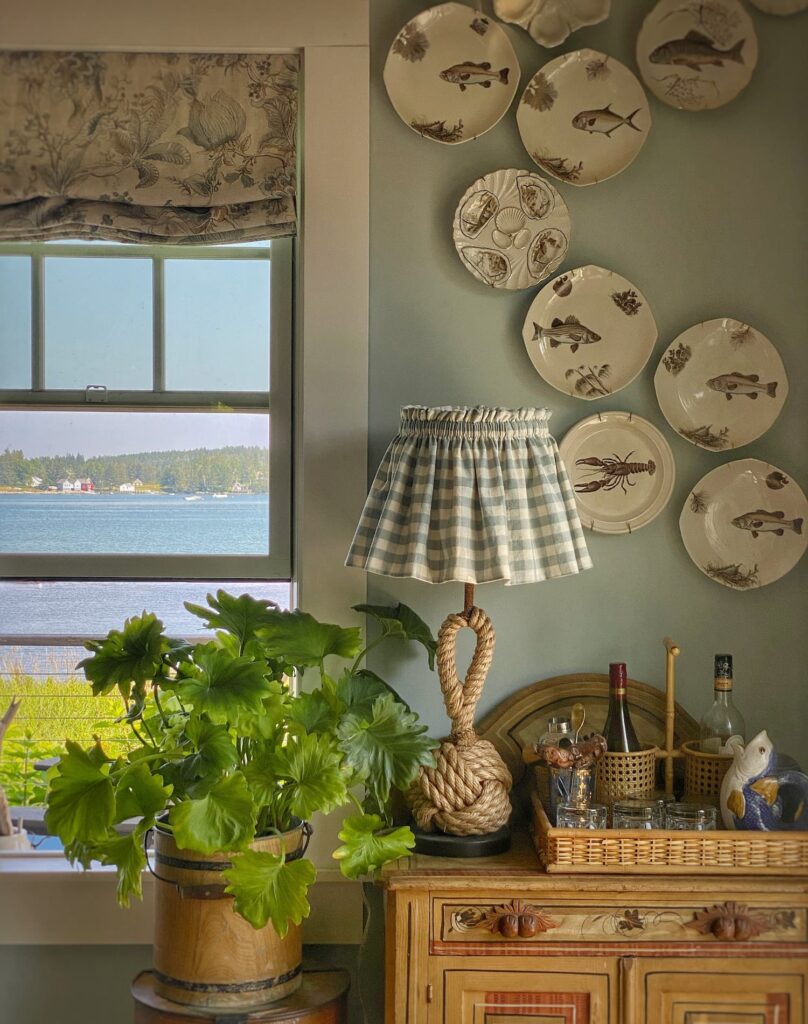
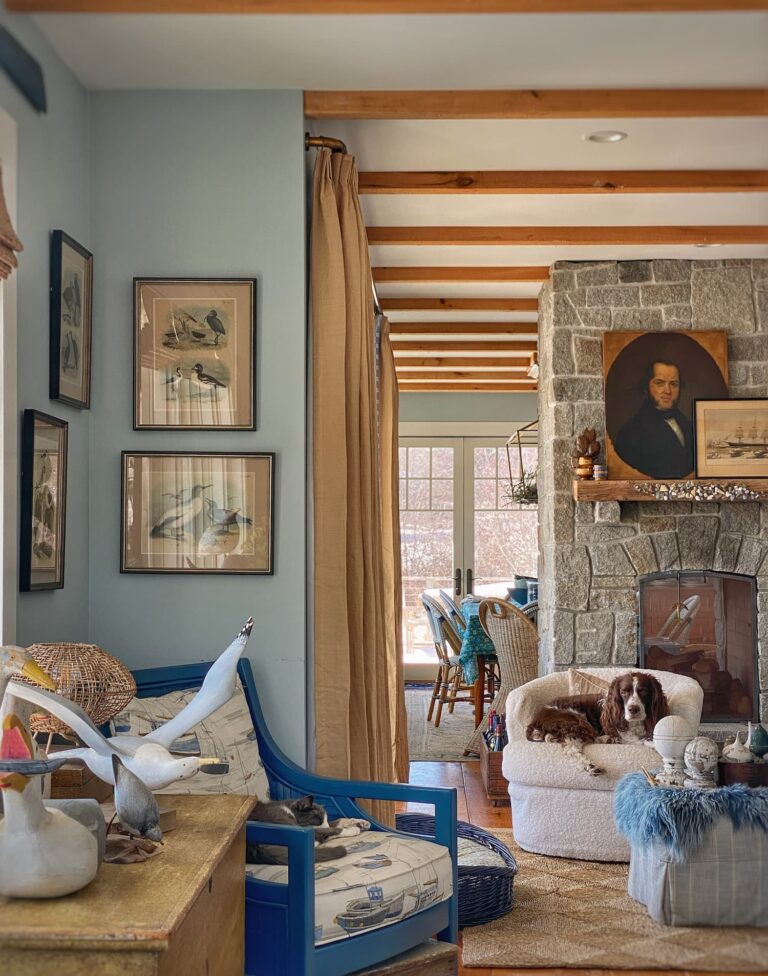
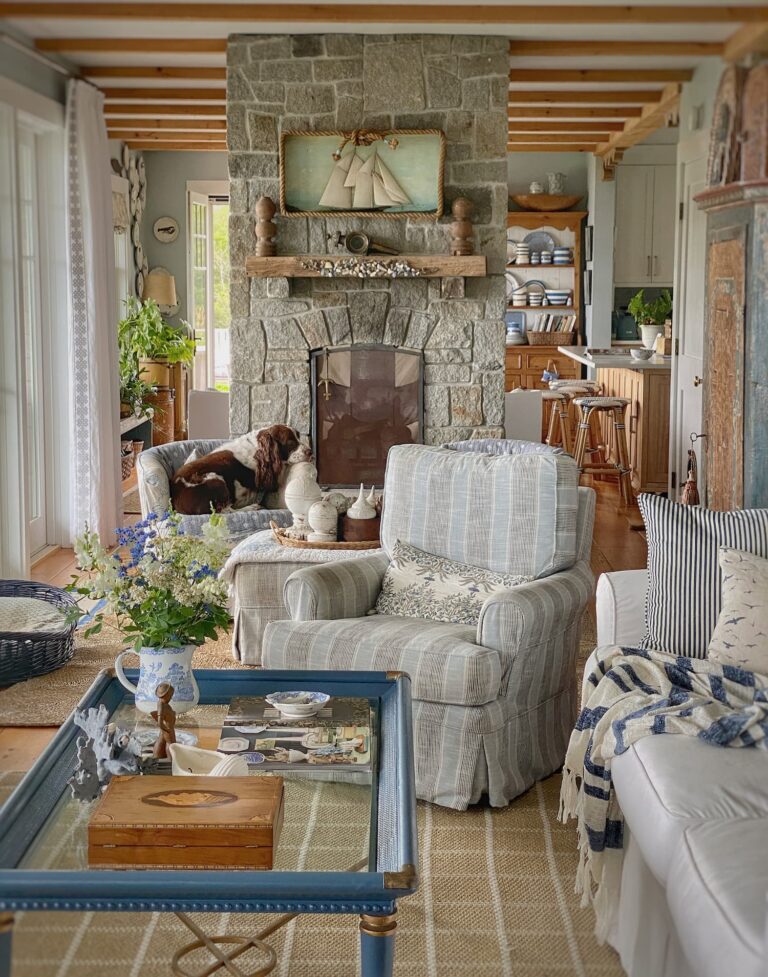
I’ve been wanting to make a change to the lamp on the drinks cabinet in the dining area for a while. The lamp was a gift, and I love its knotted rope base—it adds great texture and ties in beautifully with the nautical rope details hanging from the hutch in the opposite corner.
But something about it always felt a little “off.” Maybe it was too tall and skinny. Or maybe just too brown.
Last Sunday, I finally seized a free moment to do something about it. Inspired by a few Instagram accounts, I sewed a simple slipcover for the lampshade using leftover fabric from the sink skirt I made recently.
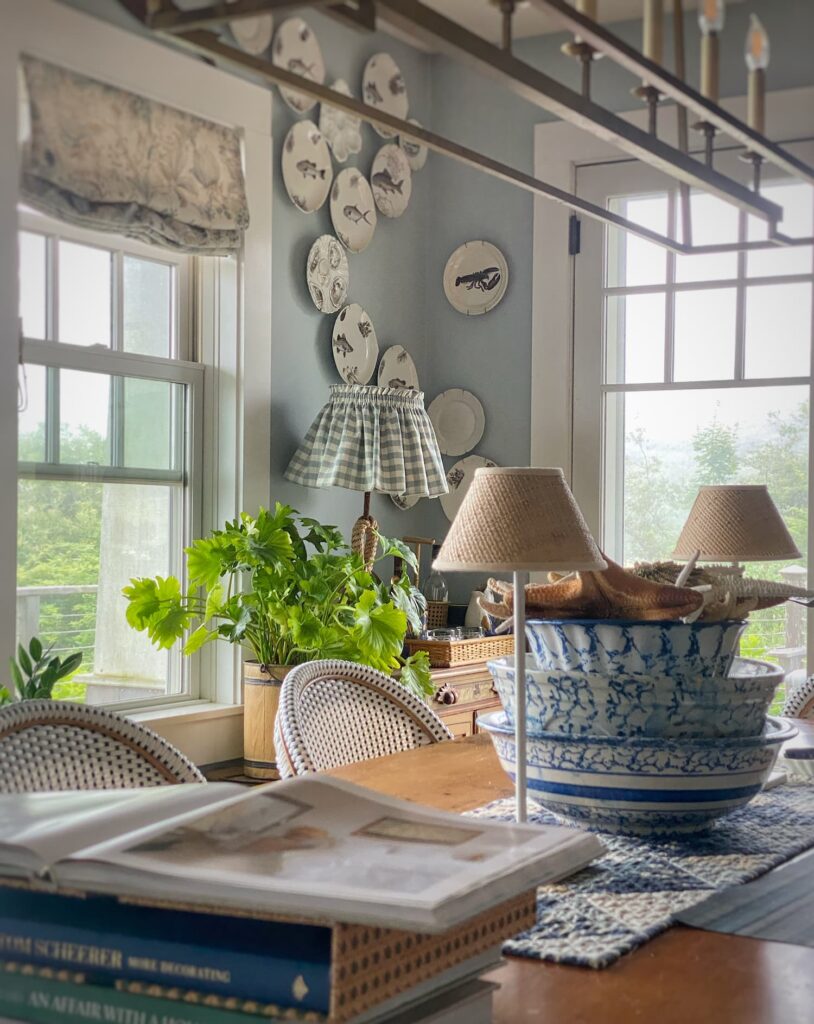
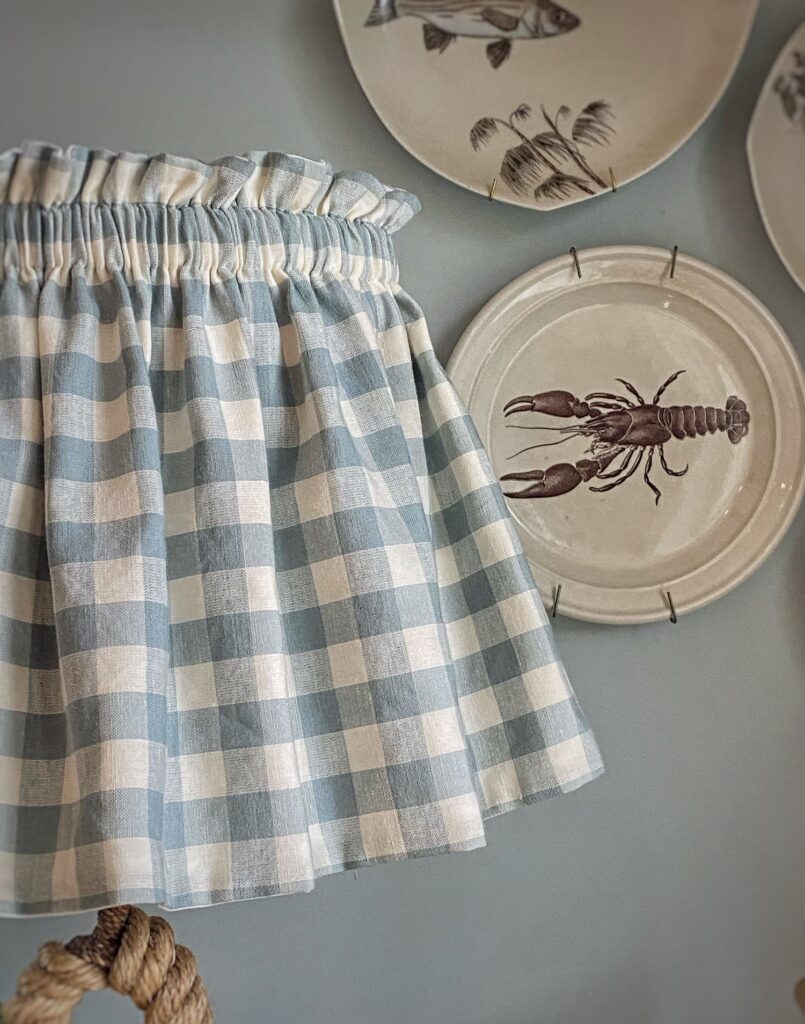
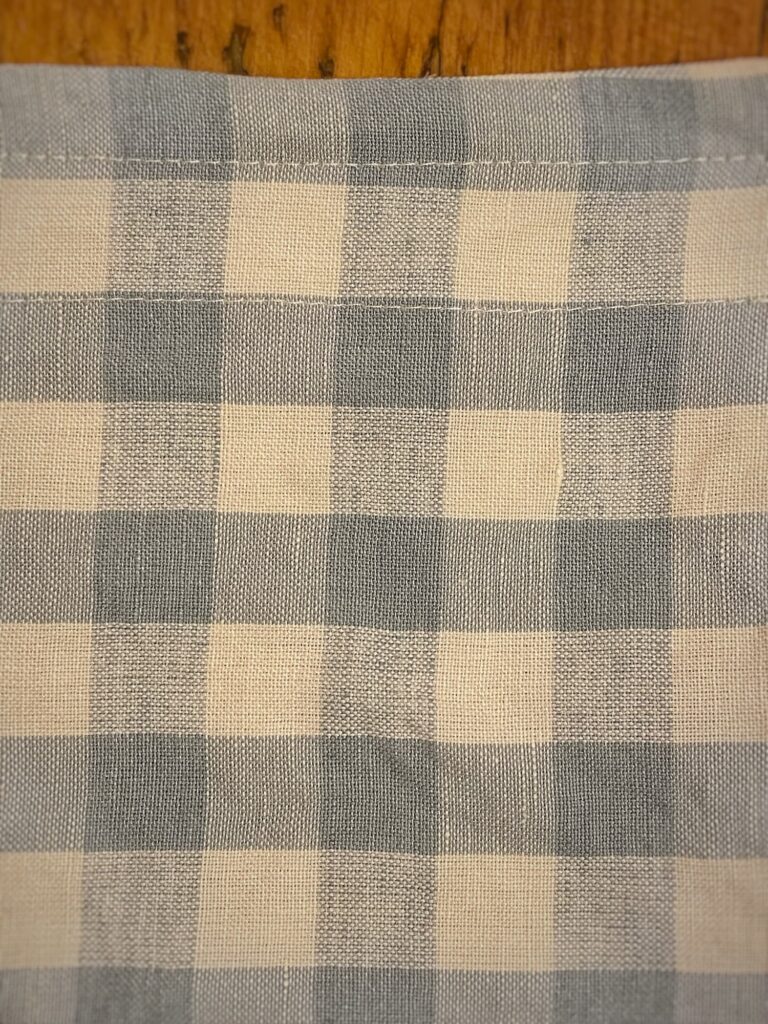
It turned out to be just what the lamp—and that corner—needed! The gathered cover, with its sweet little ruffle on top, is the perfect mix of tailored and soft. The gathers add some width to visually balance the height, and I made the slipcover just a bit longer than the original shade so it covers more of the lamp’s “neck.” The blue and white checked fabric feels both coastal and cottage, and it brings a pop of color to the corner while picking up the blue from the walls. It’s a cheerful complement to the floral shade fabric nearby, too—a nice little “mix and match.”
Here’s how I did it
This lampshade slipcover came together quickly and easily. Here’s a how-to!
Materials:
- Main fabric (I used a blue and white check left over from another sewing project) NOTE: You will need more fabric than you think to make the gathers nice and full!
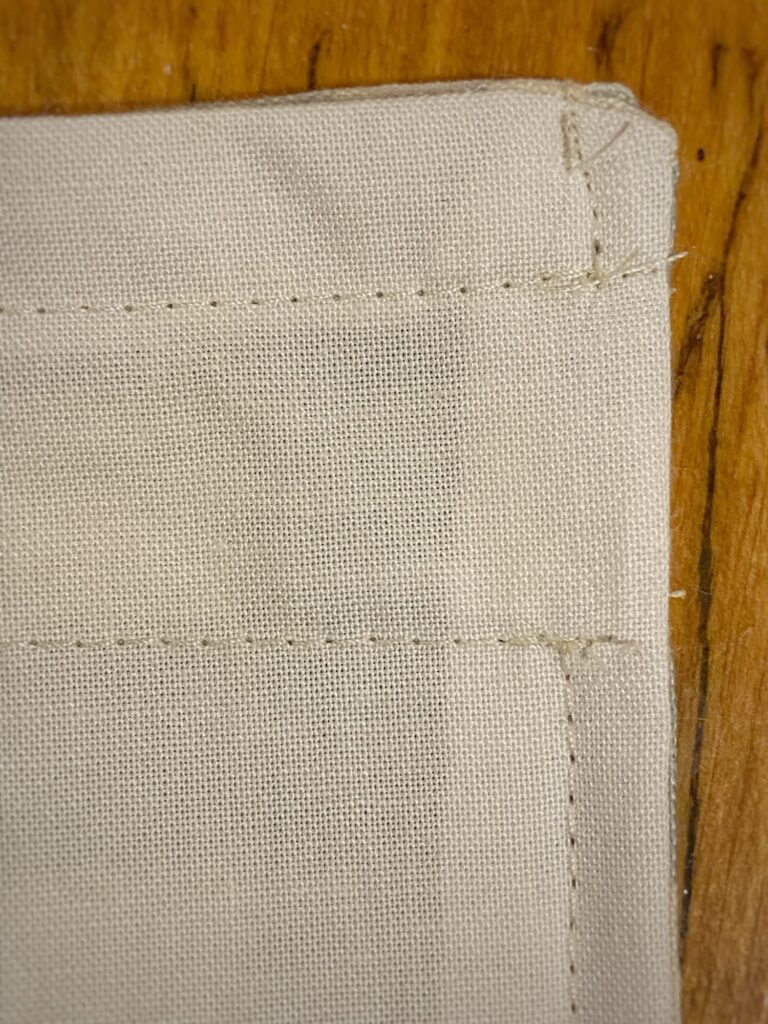
- Liner fabric (I used a white cotton sheet)
- ¾-inch elastic
- Thread and basic sewing tools (including a machine)
Cut your fabric and elastic:
- Cut the main and liner fabrics the same size—2 to 3 times the circumference of the top of your shade (to allow for gathers), and at least 2 inches longer than the length of the side of your shade. I cut a piece that was approximately 72″X12″ for a shade with a 29″ top circumference and a side length of 9.5″.
- Cut the elastic a little shorter than the circumference of the top of your shade. (Err on the long side. You can trim it later.)
Sew the outer and lining pieces:
- With right sides together, sew the fabrics on all four sides, leaving an opening along one of the short ends.
- Trim corners, turn the piece right side out through the opening, and press flat.
- Sew the opening closed with a top stitch near the edge.
Create the casing for the elastic:

- Sew two horizontal lines across the top portion of the fabric:
- The first line should be close to the top edge—this forms the ruffle.
- The second line should sit just below the first, spaced slightly wider than the width of your elastic.
- These two stitched lines form the casing for your elastic.
- Once the casing is sewn, use a seam ripper to carefully open the seams between the two rows of stitching on either end of the fabric. These openings will allow you to insert the elastic.
Sew the short ends together:
- Fold the slipcover, right sides together, into a tube and sew the short ends together, forming a circle.
- Be careful not to sew through the openings for the elastic. (You will need to sew two sections.)
Insert and finish the elastic:

- Attach a large safety pin to one end of the elastic and thread it through the casing via the slits you opened.
- Adjust the length as needed, then stitch along the seam line to secure the elastic and close the slits.
Slip the cover over your existing shade—and admire your handiwork!
You can read about the sink skirt I made with the same fabric here!
Pin this tutorial for later!
Tick Talk
I made a trip to the walk-in clinic this week.
An itchy bug bite on my inner arm had lingered for a couple of weeks. When I caught sight of it in the mirror the other night, I noticed a large, round, red rash had developed around the original bite. Alarm bells went off in my head.
It wasn’t the classic Lyme bullseye rash, but I’d been down this road before. A couple of years ago, I pulled an embedded tick off my hip, so knew what I was dealing with when the red rash developed. This time, I hadn’t seen a tick—honestly, I thought it was a black fly bite—but the telltale rash sent me straight to the doctor.
He prescribed a 10-day course of doxycycline and I was on my way. Thankfully, I caught it before any other symptoms developed. I should be just fine.
Knox County, where I live, is actually one of the epicenters of tick activity in Maine, but the risk is high throughout the state. In fact, Maine has some of the highest rates of Lyme disease in the country, along with increasing cases of anaplasmosis and other tick-borne infections. So whether you live here or are just visiting, it’s something to take seriously.
Here’s some helpful information to keep in mind.
What to know about ticks in Maine
Ticks are most active from spring through early fall and thrive in the brushy woods, tall grass, and coastal undergrowth that make Maine so beautiful.
The ticks that transmit Lyme disease are tiny—especially in their nymph stage—and their bites are painless. It’s very common not to notice a tick at all.
That’s why it’s important to know the signs of early Lyme disease:
- A red, expanding rash (not always a bullseye), which can appear weeks after the bite.
- Fatigue or muscle aches
- Headache, fever, or chills
The good news? When caught early, usually within 30 days of exposure, Lyme disease is very treatable. A short course of antibiotics—like the one I’m taking—can stop it in its tracks and prevent more serious symptoms down the line.
So take a moment to do a tick check after time outside, and trust your instincts. If something doesn’t look or feel right, don’t wait—get it checked out.
For more information on ticks and the diseases they carry check out the website for the TickEncounter Resource Center at the University of Rhode Island.
This Week Into Next

So that was pretty much my week—cleaning up after one “guest” and prepping for some others, much more welcome.
We finally had a stretch of beautiful weather—sunny and in the 70s. I got out on the water in my kayak one day. And soaked up plenty of porch time—in fact, I’m sitting out there now as I type these words. A beautiful blue and green view greets me every time I pause and look up to find the next ones.
Speaking of green, my limelight hedge is now covered in masses of small buds. They seem a little late this year, but I can already tell they’ll be spectacular, as always. I can’t wait to share them with all of you!
I hope you’re all settling into summer, as I am. Don’t be thinking about fall just yet—it’ll come in due time. There’s still plenty of summer to savor.
Next time I write here, it’ll be August—my favorite month!
Until then, take good care. Be kind to yourself and to others.

Questions, comments, or just want to say hello?
I’m always happy to hear from you.
Good morning, Molly! Just when I thought it was impossible for you to improve on a single thing in your cottage you up and sew the most charming shade for your nautical lamp. It’s perfect for that corner and gives it the oomph you didn’t know it needed. Ticks scare me…they’re such sneaky little critters that can do so much harm. Glad you followed your instincts and received intervention in time. Can’t wait to see the limelights in all their glory. Have a great week with friends.
Hi Julie — I love this lamp, but it definitely needed a little oomph! Ticks are just a fact of life here, especially with the two dogs. I pull them off me all the time, but this one caught me by surprise since I never saw the tick. Glad I got the rash, so I knew to get the antibiotic! Enjoy your week!
Thank you Molly! I can’t wait to start this project.
Good luck! Send me a pic of your shade cover!
Good Morning Molly, the shade is lovely and directions seem easy enough. Thank you for sharing them,
Happy summer and enjoy your guests!
Hi Joyce — The shade is pretty straight forward. The only bit that is a little tricky is creating the casing for the elastic. I wanted to have everything clean and tidy on the inside. 🙂
Thanks for the tutorial for the lampshade. I’m going to give it a try. Those darn ticks! They’re are bad in Wisconsin too.
I adore the lamp shade and the material. It looks perfect! so grateful you’re okay.
Thanks, Danielle! A shade like this would be cute in your home too! Glad I caught the bite before I got any real symptoms. Is Lyme a problem for you there? The ticks are so bad here!
The lamp shade is adorable!!
Hi Cheryl! Thanks so much! It was so easy to make.
I’m so sorry about your tick bite. It’s good that you check yourself all over. You are so clever with your sewing! I don’t think this seems that simple, but I haven’t done any machine sewing since you helped me with those princess skirts for Nora’s birthday. I can’t wait to see the Christmas shade covers you make.
Thanks, Liss. This bite and then the rash, once it formed, were hard to miss, ha! Fortunately I get a big rash and the bit itches alot, so they make themselves clear. I will be fine! And thanks! I had forgotten about those skirts — basically the same thing as the shade cover!
Your lampshade is darling, but I think you mean 29 inches circumference, not diameter. Diameter is the distance across a circle. and circumference is the distance around.
Oops! I made that same mistake last time I did a lampshade tutorial. That would be an ENORMOUS lampshade, ha! Thanks for pointing that out to me!
Cute project! Great information on tick bites. We certainly get them here in California and in the wooded grassy areas near me. Thank you
Hi Cristi — Thank you! Do you have Lyme disease in California? I didn’t think you did. Still good to remain vigilant, though!
Hi, I love the lampshade. I’m thinking of making it for my bedside lamps. I hate the light blue ones that I have had for about 30 years. I think I need smaller shades though! Thanks for the info on ticks. Nice that it is so treatable if caught early. It make me a little less scared of them! I found on on Lizzies head. Not sure where she got it! Have fun with your friends. Take care!
Amy
Hi Amy — If you let me know the size of your shades and pick out some fabric, I would be happy to sew them for you! I still owe you a birthday present! 😉
Oh, and yes, the tick needs to be latched on for 24-36 hours to transmit Lyme and then you have up to around 30 days to get treatment if you notice symptoms. At least that is what I have been told.
I love the lampshade. You really do have an eye. But I have a question about the lampshade liner, which you say is cotton, but in the close-up photo looks more loosely woven, like linen. If you used cotton, what type?
Hi! I used a cotton sheet for the lining. The weave probably looks big because I was up so close. Also I didn’t need a fabric that was too finely woven for the lining. You could even use a poly-cotton (or linen!). I just like it to give the cover some body and to make it look need and tidy on the inside.
Molly your lampshade is darling. It really looks great with the cool knot lamp base. You are so talented .
I am glad you caught the tick bite. I appreciate all the tips. I didn’t know about getting in soon to see a Dr. Your summer sounds great. We’ve had very cool weather in California- all 70’s for weeks and I have been loving it. I don’t know if it’ll last! The only drawback is the garden is going slow…
Hope August is great. Can’t wait to see your limelights!
xo Kim
Hi Kim! The lamp really is cool — it just needed a little something to set it off! Yes, the sooner you catch Lyme (especially before any real symptoms set in), the better chance you have at having no issues at all. We have been cool here too, in the 60’s. 70’s is warm, ha! The ocean is still in the 50’s. I think usually it is in the 60’s by now. And yes, the Limelights are behind schedule. Can’t wait for them to bloom! Enjoy your summer!
Check those dogs. They spread ticks all over upholstered furniture and rugs. They are right up there with black flies and green heads. Only in New England!…..but I still wouldn’t live anywhere else!
Hi Melissa — Of course I check the dogs! Hard to find the ticks on them, though. And I wouldn’t live anywhere else either!
Ticks are awful!! Since their origin comes from Lyme, Connecticut I’m sure it’s worse in your neck of the woods! Stay safe! Love, Love, Love your lamp shade. I need to break open the machine and get to work!! Way too hot here in Maryland to go outside!
Hi Linda — Yes, the ticks here are bad, some of the worst in Maine. The lampshade is easy to make, so definitely get y9ur machine out! I think it has cooled down after yesterday’s rain — at least that is what my daughter said. Thanks for reaching out!
Thanks for the idea! an adorable skirt for ur lamp!
You are very welcome! Such an easy way to update a lamp!