Box Pleated Lampshade Slipcover Step-by-Step Tutorial
Today I am sharing a step-by-step tutorial for how to make a box-pleated lampshade “slipcover” or “skirt”. Plus, tips on how I painted an inexpensive turned wood lamp base to give it a designer look!
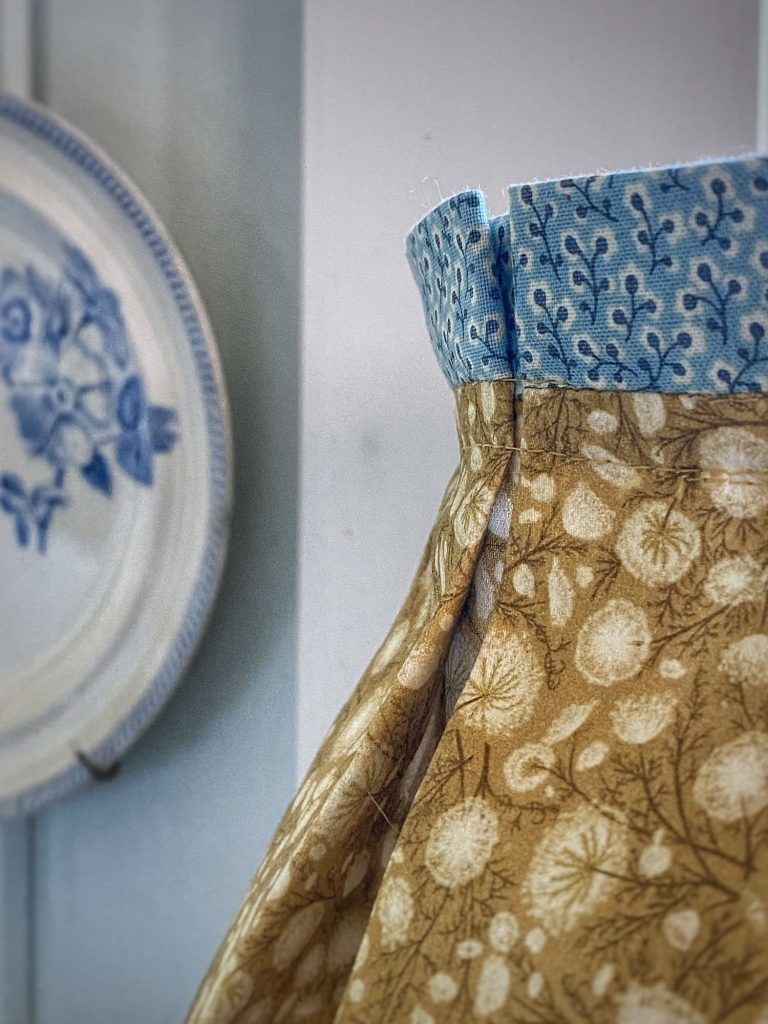
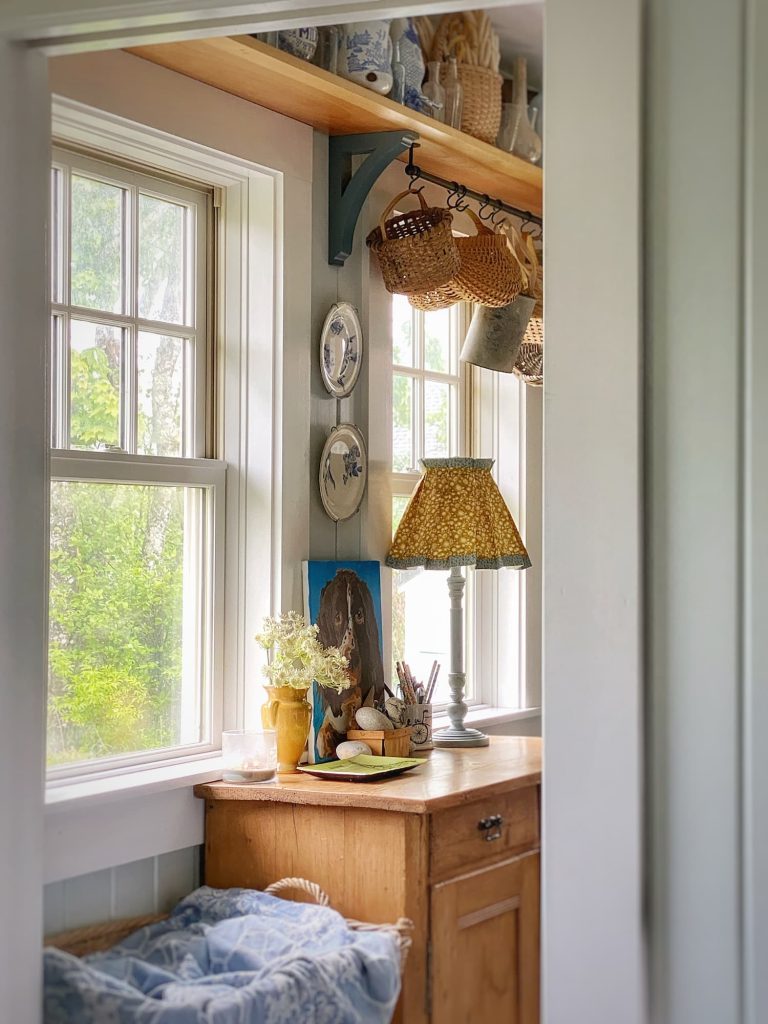
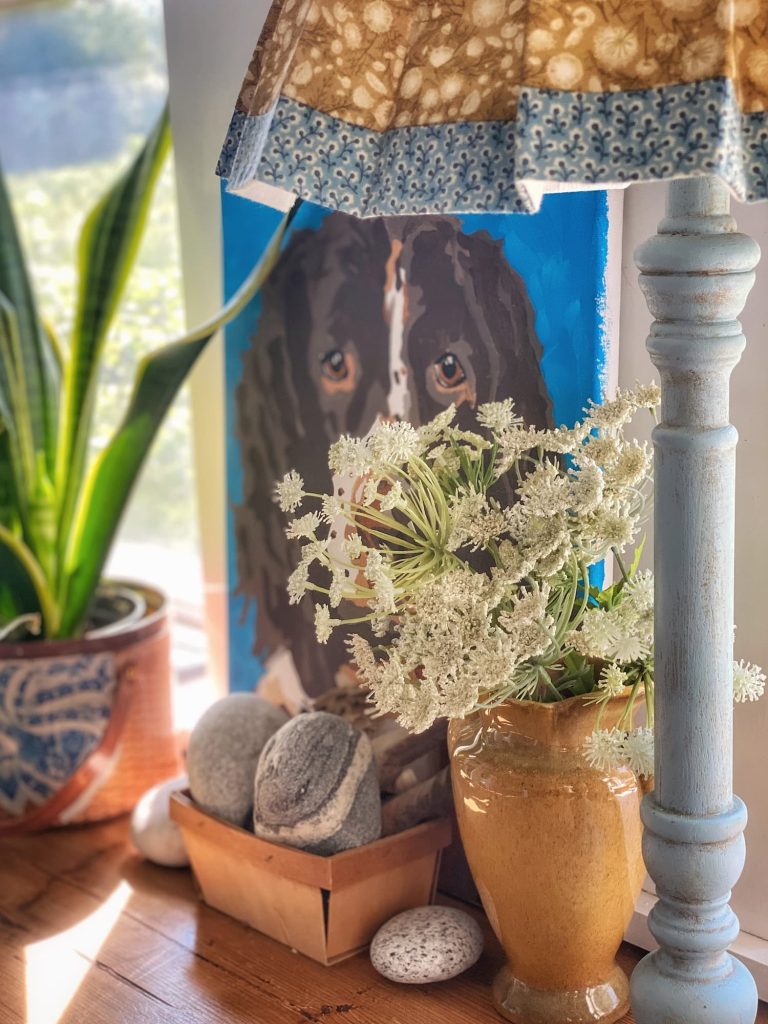
My Cute New Lamp and Lampshade Skirt
Last Saturday here on the blog I shared a comprehensive guide to lampshades.
Everything from picking the right size and shape to making your own cover.
When to choose a fun pattern or color, and when to keep it simple.
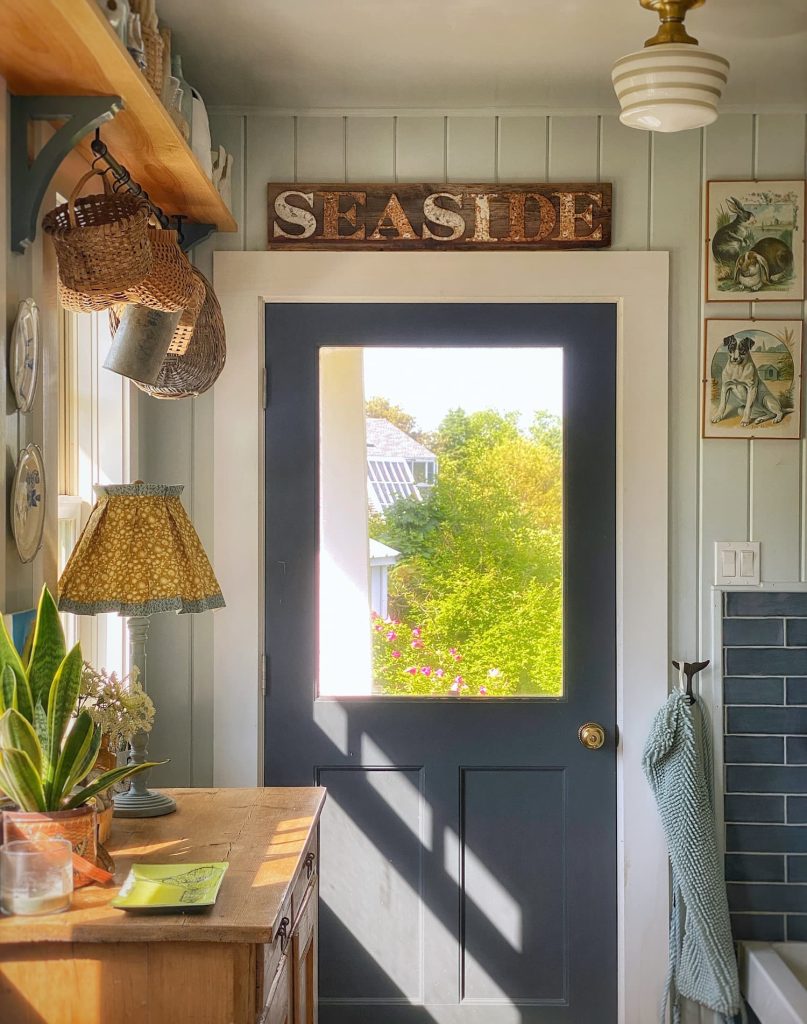
Shades from around my home.
Plus shopping links for some fun lampshades I love!
If you missed it, you can read it here: Shedding the Light On Lampshades.
And today, as promised, a step-by-step tutorial on how I made the fun lampshade “slipcover” or “skirt”, that inspired last week’s post.
I am seeing these kinds of lampshades in all kinds of online shops. So, if you don’t want to make your own, I am again sharing links to retail sources for these cuties!
I am also providing tips on how I painted an inexpensive wooden candlestick lamp from Walmart to give it a designer look to match the shade!
Are you ready? Let’s get sewing!
The Inspiration and the Before
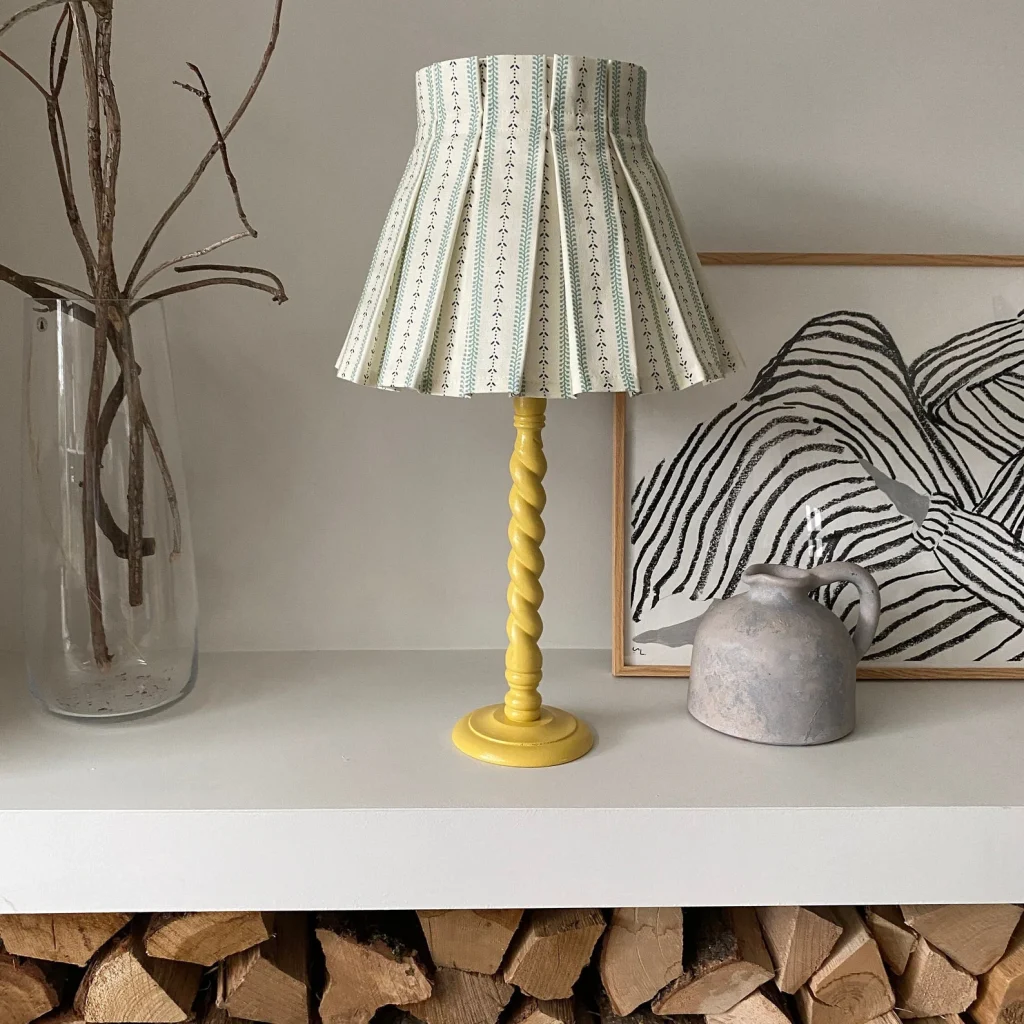
But first, the inspiration…
This is from an Etsy site, MylittlewishShop.
As soon as I laid eyes on it, I was completely smitten!
And then I started seeing them on other websites too.
I figured I could make my own!
So I started pulling the pieces together.
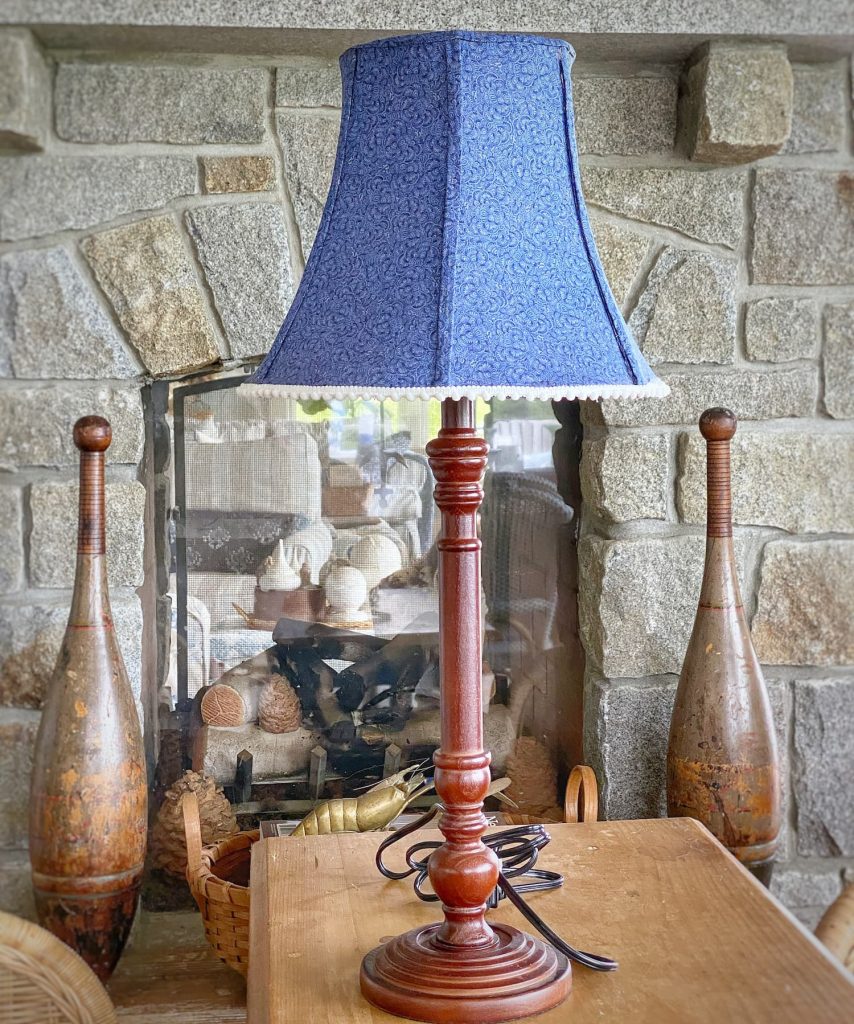
The lamp is from Walmart, but I found it on eBay for cheaper. I will share both links below.
And the shade was someone else’s diy that I found at our local transfer station resale shop.
The person actually did a nice job, but it was falling apart.
And of course I had other plans…
I got two shades for $4!
Material List for the Shade
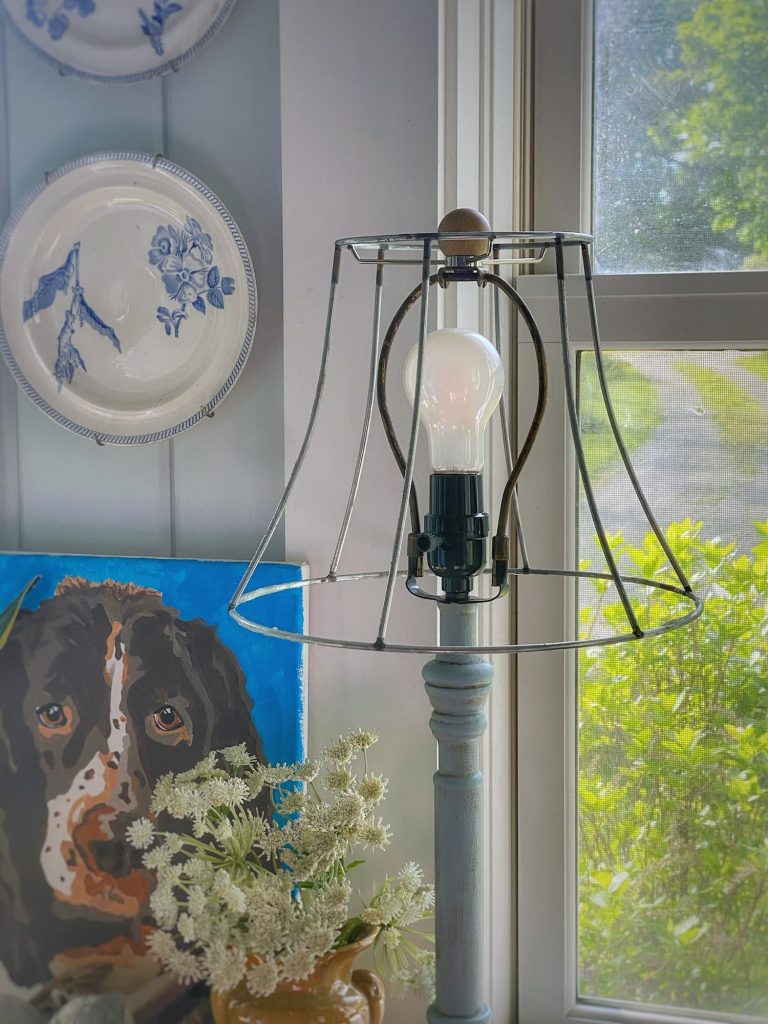
- Shade or shade frame: I ended up using just the metal “skeleton” of the shade, with the slipcover resting on top, because that is what I was left with when I removed the fabric from the shade I was using. A simple white shade would work well too. I recommend using a shade that is tapered — an empire or bell. If you use a drum shade, the pleats will just hang straight, and not open up at the bottom. (See my lampshade guide for a description of all the different shapes!)
- Fabric or fabrics of your choice: Be aware that you will need more fabric than you think! Because of the box pleat you will need a length 3X the circumference of the top of shade plus extra for seams/hems and overlap. Add a few inches onto the height of the shade too, for seams/hems plus extra so that the slipcover fully covers the shade on the top and bottom. I did not buy enough fabric, so had to go with the colorblock design with contrasting fabric I fortuitously had on hand. I actually like this design better, but it was definitely more work!
- Optional lining fabric: See note above about buying plenty of fabric. I ended up having to scrounge for fabric from my stash since I also did not buy enough of this fabric either. Good thing I usually buy too much!
- Thread to match fabric
- No-sew sticky velcro tabs for fabric
- Sewing machine
- Basic sewing supplies: pins, seam ripper, scissors, measuring tape, ruler, etc… A good ruler is particularly important for measuring the box pleats here.
- Iron and ironing board: Crucial for getting those crisp seams, hems, and pleats.
- Optional Roller cutter and board: If you are going to do any semi-regular sewing projects, this is a game changer, and not just for quilters! It makes measuring and cutting a straight line so much easier! Mine was relatively inexpensive from Walmart. I truly don’t know how I did without it before!
Sewing Your Lampshade Slipcover
Now that you have all your materials, it is time to sew your shade.
I did not follow any directions for making this slipcover. I looked closely at ones I saw online and figured it out myself.
This project was not hard, but it does require attention to detail.
Measure, pin, and iron carefully, and your shade will come out great!
But really, this shade is all about casual charm, so it doesn’t need to be perfect!
Also a word here about lining your slipcover: I opted to line it for several reasons.
For one, I was using a lightweight sateen fabric and I wanted the shade to have more body.
Secondly, especially since I ended up piecing the shade together, a lining looks tidy and hides the “insides”.
And lastly, I kind of hate double-folding and ironing a hem. Mine always turn out a little wonky. Plus, it looks neater without the topstitched hemline.
All-in-all, I recommend going with the lining. I think it produces a better shade all-around.
So, the directions I am providing are for a lined shade slipcover.
1. Measuring
Measure the circumference of the TOP of your shade and the length of the SIDES (not the height). I couldn’t find my tape measure, so I used a string to measure the circumference.
The circumference of the top of my shade was 19″. Times 3 for the box pleats meant I needed a 57″ wide piece, plus extra for seam allowances and overlap. Since my fabric was just 44″ wide, I needed to sew two pieces together. Remember to account for this extra seam allowance when measuring.
Fortunately the width does not have to be a super precise measurement, because you will want some overlap at the closure.
The sides of my shade measured 9″.
Since I did not have enough of the primary fabric, I decided to add a contrasting 1″ band of fabric at the top and bottom. So, in my final measurements I needed to take two extra seams into account.
Again, the good thing about this slipcover is that it does not need to be an exact size.
All things (pleats and seams) taken into account, my final slipcover ended up being 22′ X 10″. A perfect fit for my 19″ X 9″ shade.
2. Cutting
Once you have figured out your measurements, you are ready to cut!
I ended up cutting:
43″ X 9.5″ and 18″ X 9.5″ pieces of the primary fabric (accounting for seams and wiggle room)
43″ X 2″ and 18″ X 2″ pieces of the contrasting fabric (accounting for seams and wiggle room)
(If I had not done contrasting bands, I would have cut 43″ X 11.5 and 18″ X 11.5 pieces of my shade fabric)
51.5 X 11.5 and 9. 5 X 11.5 pieces of lining fabric I had on hand (accounting for seams and wiggle room)
3. Sewing
Note: I usually use a 1/2″ seam allowance
Begin by pinning and sewing together the two lengths of each of the like fabrics (primary, contrasting, and lining).
This creates the long width you need for each of these fabrics.
Press all seams open and flat.
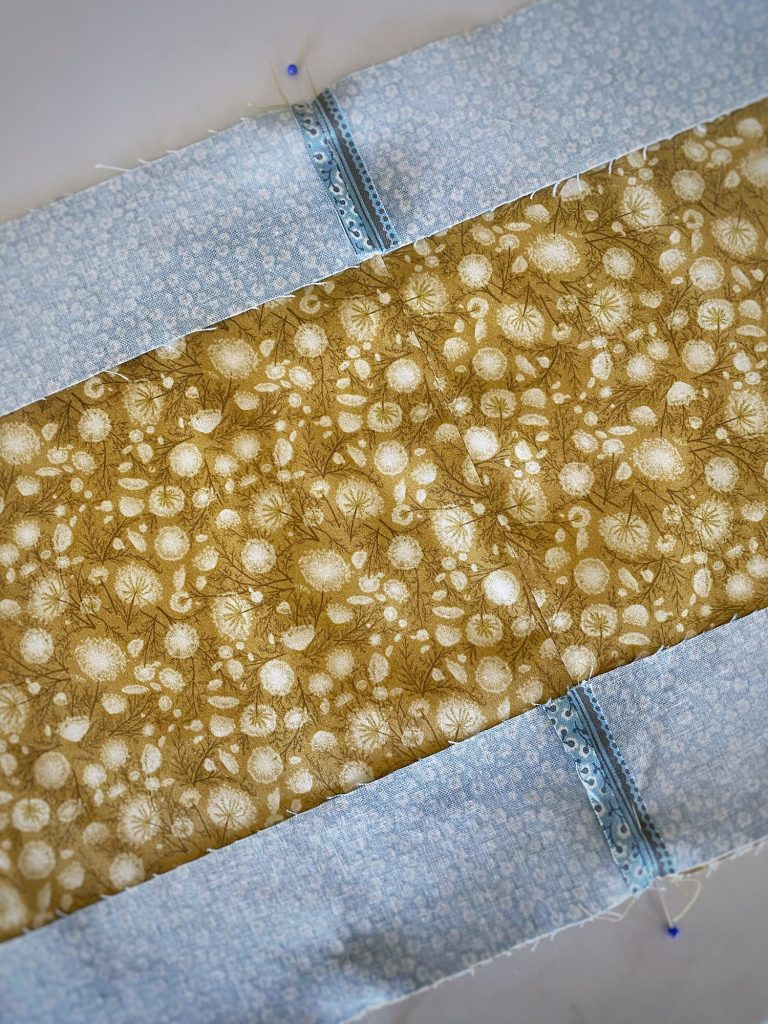
Then, with right sides together, pin and sew the contrasting fabric onto the top and bottom of the primary fabric.
Press all seams open and flat.
Again with right sides together, pin the outside shade fabric to the lining on all sides and then sew around like you are making a pillow cover. Remember to leave an opening of several inches on one end (not the bottom or top of the shade).
Trim the corners, then use the opening to pull the fabric through to turn right side out.
Press flat, being careful to keep the lining fabric from showing along the edges of the outside.
Sew the opening closed near the edge. (I run the stitch along the edge of my sewing machine foot.)
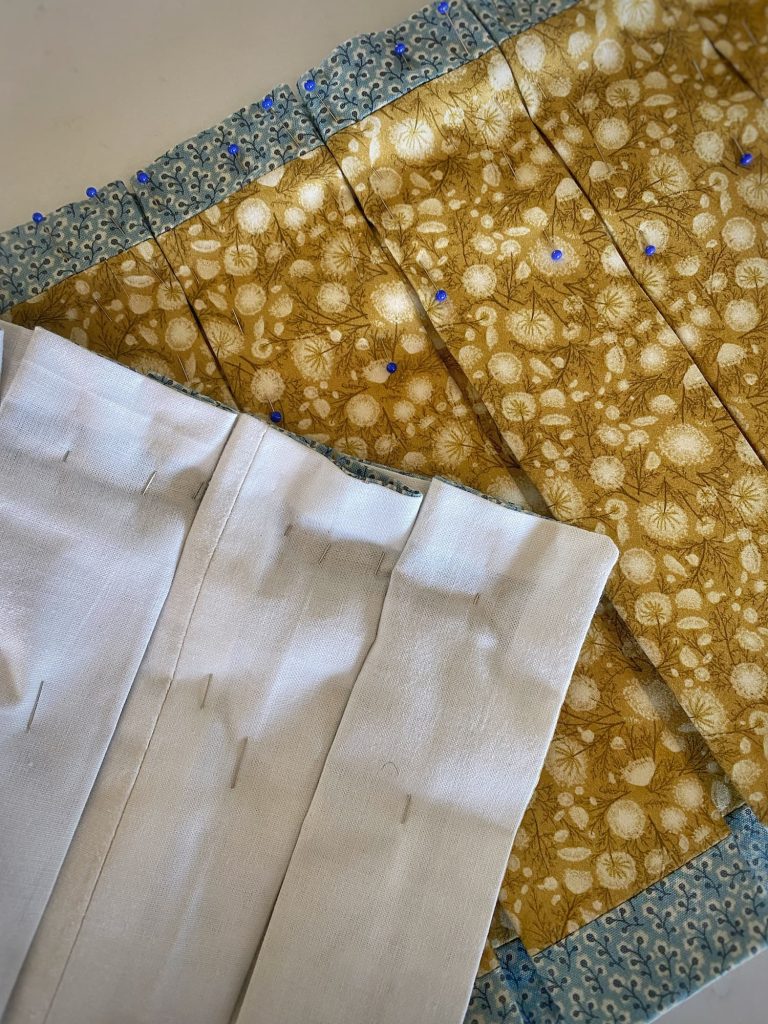
4. Pinning the Pleats
Now you are ready to pin the pleats!
Unlike a standard pleat, a box pleat has a fold on each side. So it is actually two standard pleats facing opposite directions, if that makes sense.
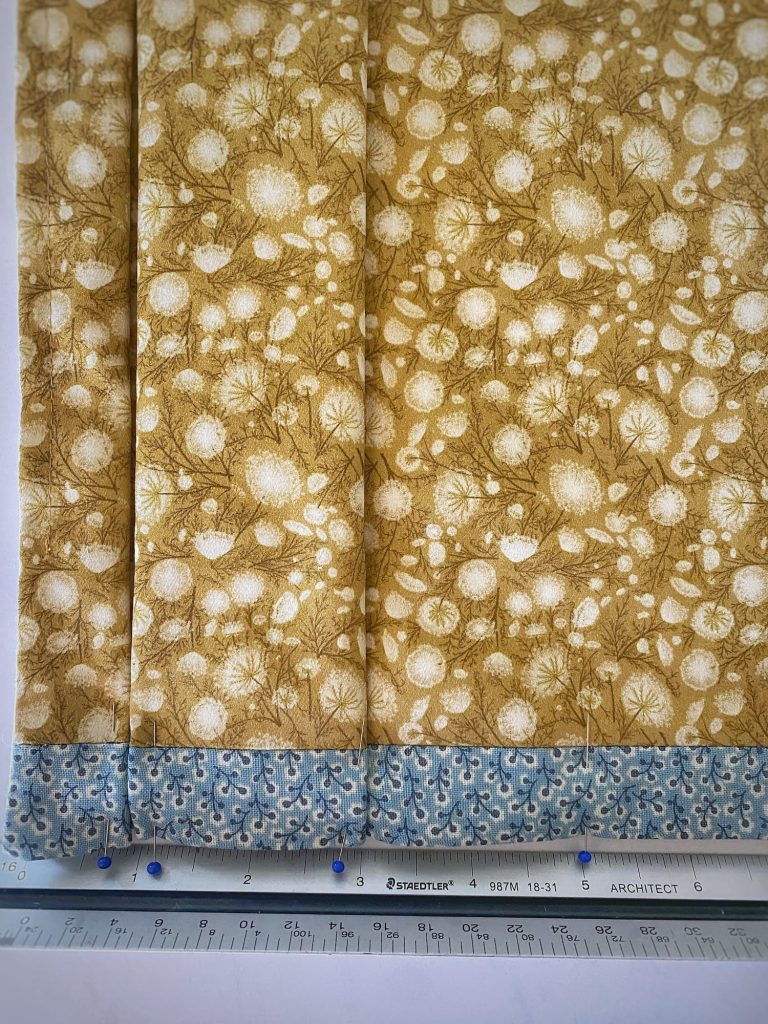
I made each of my pleats two inches wide. That means that each fold is one inch and they meet in the middle on the inside.
I found it easiest work from left to right, with the top of the shade closest to me, so I could see the pleats clearly. For the record, I am left-handed. If you are right-handed, you might find it easier to work from the other direction.
Since I was just figuring things out, I ended up starting with a half pleat that is one inch wide. This worked out well, because of the overlap on the other end, but a full pleat might have worked too.
I proceeded in the follow way:
I measured two inches from the previous pleat, and marked that spot with a pin.
Then I pulled the pin to the left to meet the edge of the previous pleat, folding the fabric over on itself in half, and ending up with three layers of fabric. I then moved my marker pin to secure that side of the pleat.
Next I measured two inches from the edge of the pleat I had just created and marked that spot with a pin. This time, I slid the pin to the right, while simultaneously tucking the fabric under, until it met the edge of the previous pleat on the back side. Then I used the marker pin to secure this pleat.
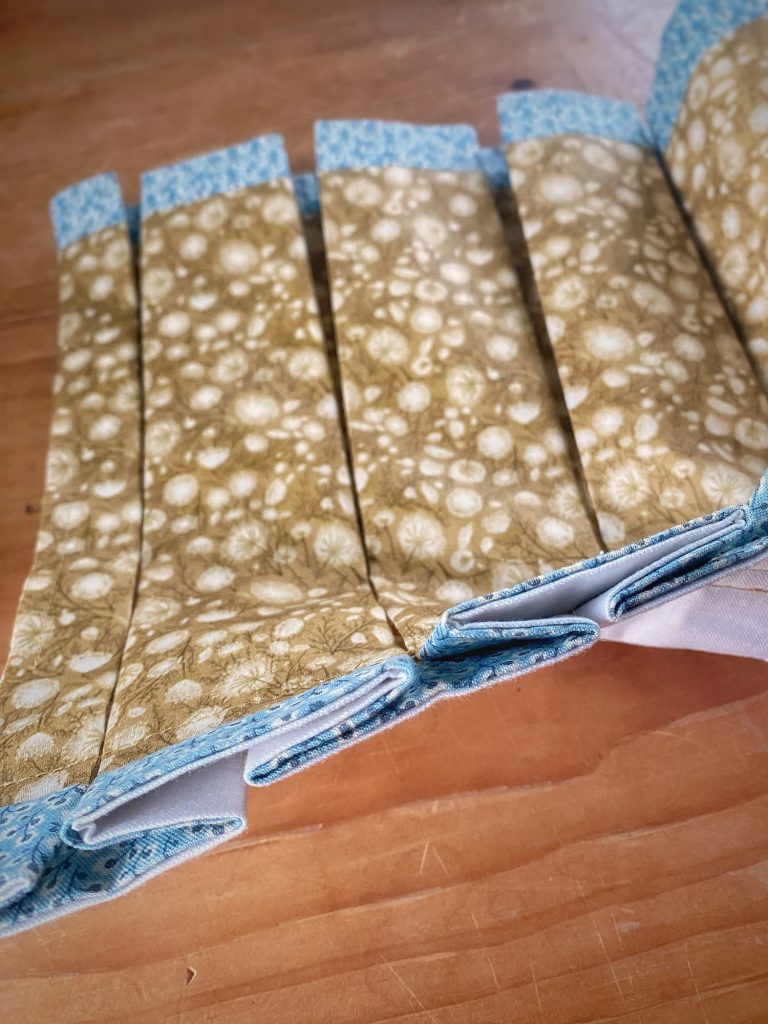
This should create one two-inch wide box pleat made up of two one-inch opposite-facing pleats that meet in the middle of the back.
I continued in this manner across the length of the shade, trying to keep the pleats touching on both the front and back side of the shade.
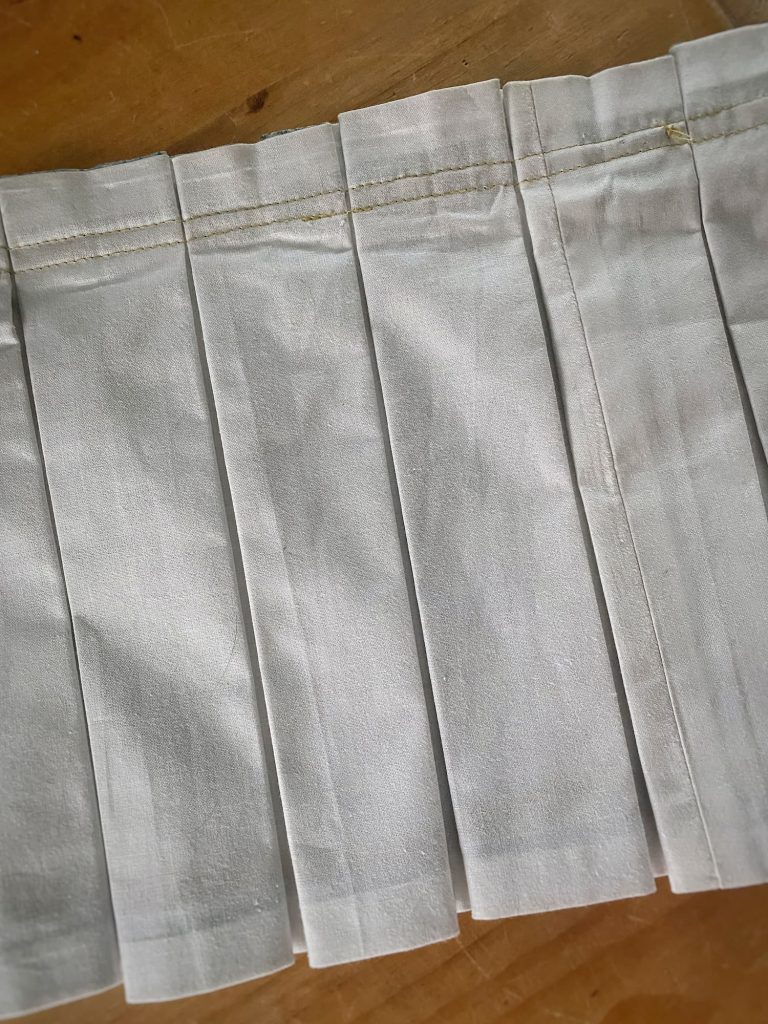
When you are done, if you look at the backside of the shade, you should see nice two-inch box pleats there too!
I ended up with 9 full pleats, the one half pleat, and an extra 1-inch piece on the left. Again, you want to have some overlap so that the shade is full covered.
5. Sewing the Pleats
Now you are ready to sew the pleats!
I like the look of two rows of stitching. I think it gives the pleats a bit more structure.
Before sewing, I pinned the pleats again a few inches down the shade to keep them secure and tight when running through the machine.

I sewed the first line of stitches one inch down from the top.
And then the next one below the first along the edge of my sewing machine foot. (A favorite measuring tool of mine!)
When you are sewing try to be careful to avoid having any of the bottom pleats get caught up so small folds are sewed into the fabric. I had a couple of these I needed to fix.
7. Finishing
You are almost done!
The tricky work is done!
Time to iron the pleats to make them nice and crisp!
Or you could leave them un-ironed for a relaxed look.
I chose to iron…
Before ironing, I lined the pleats up straight and pinned them along the bottom edge.
Then I gave them a good iron with plenty of steam.
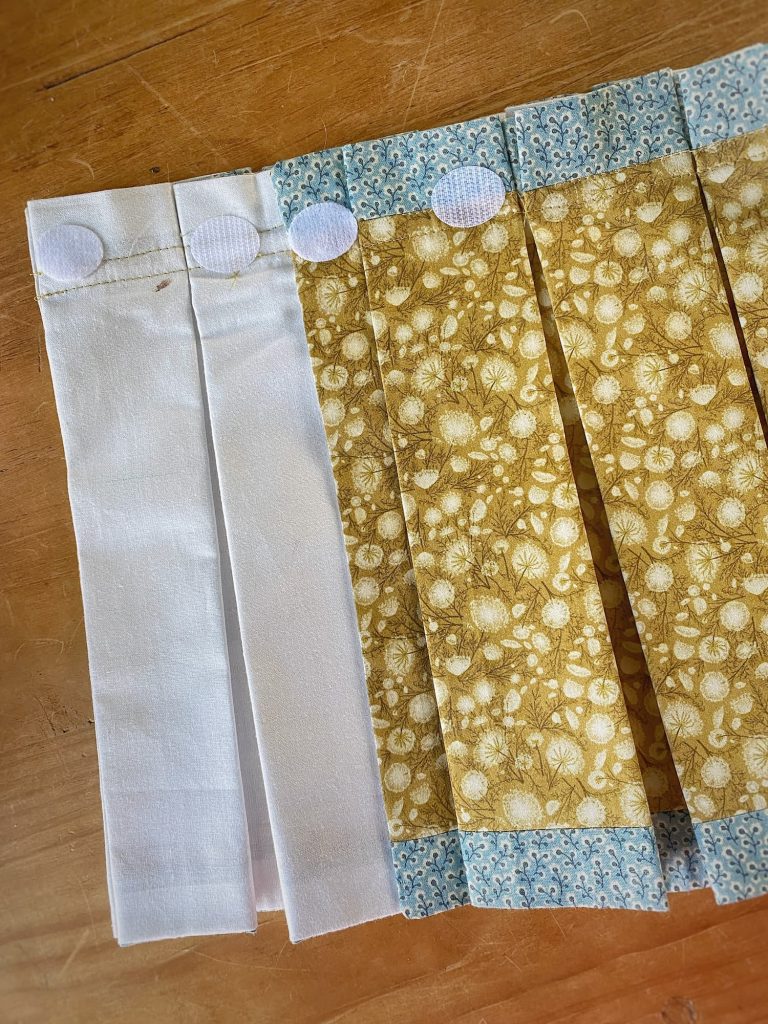
As a last step, I applied no-sew sticky velcro tabs to the top ends of the slipcover.
To hang the “skirt” on your shade, simply wrap it around and secure the velcro tabs. It doesn’t actually attach to the shade and is easy removable!
So now you can change your shade slipcovers seasonally, ha!
8. Admiring and Sharing
A final step in any project I complete is to step back and admire my handiwork.
Then take a picture! Post it on social media! Send it to family and friends — including me!
And in my case, write an entire blog post about my cute little lampshade skirt!
Painting the Lamp
I am losing steam a bit here, but I did promise I would share a few tips on how I painted the lamp.
The shape of the turned wood candlestick lamp was great, but the shiny dark brown finish was not the look I was going for.
That, I knew, was something easily solved by the power of paint! I had in mind a nice smooth finish with a soft luster.
However, I was using only materials I had on hand.
The shiny finish on the lamp definitely needed some kind of primer to ensure the paint would adhere properly. I had some light gray spray chalk paint, so used that.
But for some reason, it left a rough grainy coating on the wood. So much for my smooth finish…
I soldiered on, though, with a coat of blue floor paint left over from when I painted the checkerboard pattern on the kitchen floor.
You can read all about that project here!
The finish was still gritty in spots, so I took some sandpaper to it. I am always game for some distressing.
Gone was my vision of a perfectly painted lamp…
Next I grabbed a small jar of brown paint. I watered down a small amount and started to paint splotches of it on the lamp, wiping immediately with a paper towel.
On top of that, more blue paint applied with a mostly dry brush.
I continued to alternate the brown wash and blue dry brush, wiping it down occasionally with the paper towel, until I achieved the desired look.
Not exactly what I had envisioned originally, but I actually like it better. I love it when serendipity takes control!
Shopping Links
The primary fabric I used is from Clementine, a favorite local fabric store. They design their own fabrics, many with a local theme.
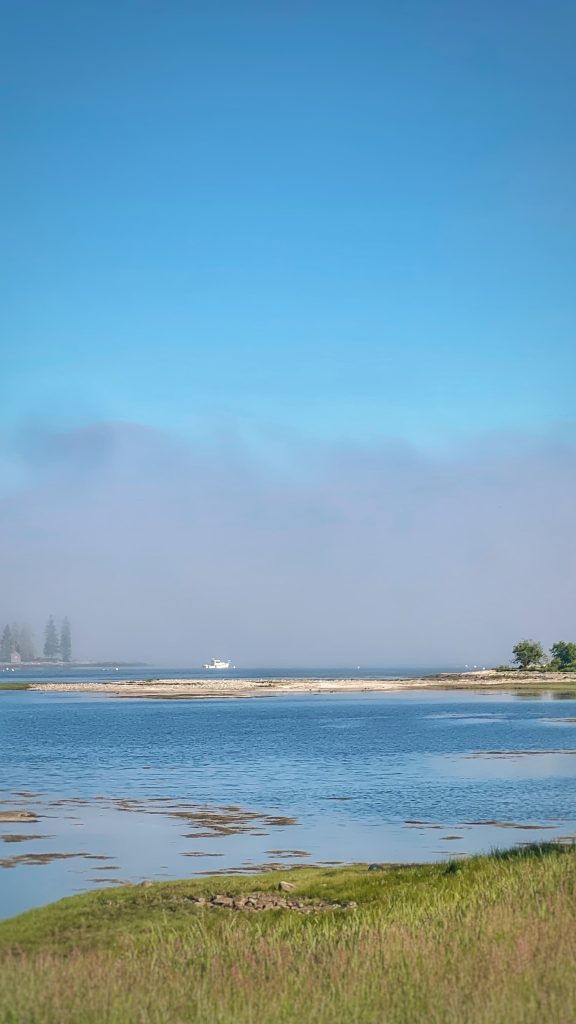
Lucky for you, they have an online store! I used their Queen Anne’s Lace sateen in Honey color. It reminds me of our field in the summer when it is filled with this delicate wildflower!
The contrasting fabric is Dauphine in French Blue from Fiddlehead Artisan Supplies in Belfast, ME. I love these fabrics together. Another time serendipity stepped in!

That’s It!
That’s it for this midweek post.
Please let me know if you make one of these fun lampshade skirts yourself!
And of course reach out if you have questions!
Be well, friends!

Questions, comments, or just want to say hello?
I’m always happy to hear from you.

Love this guide! Not sure I have the sewing skills myself to accomplish this, but I’m so impressed by the final product
Thanks, Zo! I don’t think I have ever seen you use a sewing machine! But I could certainly teach you! 😉
Love your lamp project. You are one talented lady.
Thanks, Suzie! I really had fun sewing this!
Molly, thanks for the tutorial. This is super cute. I am wondering if you can make these and put them over a simple white shade~perhaps for a seasonal change in decor. I used to swap out my lamp shades for the winter and summer, but I like this idea even better. That way you can launder them (?) or at least vacuum off the dust. Hmmm….now you’ve got me thinking. Thanks for sharing~great post.
Hi Mary! I am so happy you found the tutorial helpful! Yes, that is exactly how these “slipcovers” or “skirts” work. They just slip over an existing shade or shade frame like I used. That is why I call them “slipcovers”. I was actually lying in bed this morning, wondering whether I should have stated that clearly in my blog post… If you prewash the fabric, you could certainly toss it in the wash, though you would have to press the pleats again. Have fun!
Molly your new shade looks fabulous! Thank you for sharing your “step by step” instructions.
Have a wonderful day!
Thanks, Elizabeth! I really had fun with this little project!
My Goodness that was a lot of work! You are really talented to be able to do this. It really did come out fabulously! Thanks for sharing all the tips.
Thanks, Liss! I really had fun sewing this one!
I’m in love with that lampshade and the lamp is so cute too. I need to take sewing lessons. I lack a bit of patience too, but this is so inspiring!
Hi Ann — One of these shades would be cute in either of your homes! You don’t have to sew them yourself!
Your shade is adorable! I may attempt one at some point. Just this week, I received an email from a designer who was charging for her directions on how to make something similar. Hmmm.
I hope you do give it a try, Jane! Hmmmm… charging for just the directions? Maybe I am missing out! Let me know if you have any questions. I will answer them for free!
Love this project so much! Dumb question here – you said to measure the sides but NOT the height. What is the difference between the sides and the height? Ha! And the cut fabric itself is not tapered, but the tapered look comes from the pleats opening toward the bottom of the shade, is that correct? I adore those two fabrics together – perfection!
Hi Amanda! Not a dumb question at all! I didn’t know any other way to describe it… I recommend a lamp shade with flared sides — where the top is smaller than the bottom. So the length of the side of the shade, the angled part, will be longer than if put the shade on a flat surface and measured from that surface straight up to the top of the shade. Does that make sense? And yes, you are correct — You just cut a straight length of fabric. Because the side of the shade is angled, the pleats open up at the bottom. If you used a straight-sided drum shade, the pleats would hang straight. Let me know if this still doesn’t make sense to you!
Yes, that makes perfect sense. What you were describing as the sides I had envisioned as the height, but I understand how they are actually two different measurements. 🙂 Thank you! As I look around my house, most of my shades are drum shades, so I’ll do some looking and see what I can come up with that will be a good fit for those.
Hi Amanda — As I said in my post, drum shades are very easy to cover with fabric!